I don’t eat enough sweet potatoes. Do you?
I love ’em, but I definitely don’t eat enough of them. I picked one up at the grocery store the other night with the idea of having half as a side to dinner. I didn’t feel like taking the time to bake it, so I threw it in the handy-dandy microwave (never used to use one, until we moved to the new house) and voila! It was done in like 6 minutes.
After dinner I was heating up a cup of lemon balm tea before bed (recipe here), I popped open the microwave (it’s becoming a regular kitchen appliance now) and there’s the sweet potato still on the plate, fully cooked and now cooled. Oops.
Huh. So now what to do with it. I’ve already eaten dinner. Well, I guess I’ll throw it in a container and figure it out in the AM.
The next morning I decided I was going to attempt to go for another run, later in the day (I have to pump myself up for running, it’s not an activity I particularly like). So I started to plan out my meals for the day so I would have adequate energy for the workout (I was planning on having KD for lunch, as awful as that is).
I’m not one for sweet breakfasts. You’ll usually find me having yogurt and organic seed granola, or eggs and cheese. Mmmm… cheese. But today I wanted to try something different, and I had that damn sweet potato to use.
I love pancakes, but NEVER order them when I go out for breakfast, it’s only something I’ll have at home. So off I hopped to the kitchen to figure it out.
An hour later, and I was making breakfast. (Coffee went cold TWICE during that hour, another great use for the micro-ondes, reheating that cuppa!).
Here’s what you’ll need for these tasty, filling and nutritional pancakes.
- 3/4 pound sweet potatoes
- 1 1/2 cups whole-wheat flour
- 3 1/2 teaspoons baking powder
- 1 teaspoon salt
- 1/2 teaspoon ground nutmeg
- 1/2 teaspoon ground cinnamon (Add more to taste, I love cinnamon and the health benefits!)
- 2 eggs, beaten
- 1 1/2 cups milk
- 1/4 cup butter, melted
Since I had the cooked and cooled sweet potato, the skin came right off. I didn’t have a hard time peeling it at all. I grabbed the hand blender and whipped it up. I didn’t want any chunks of potato in my pancakes.
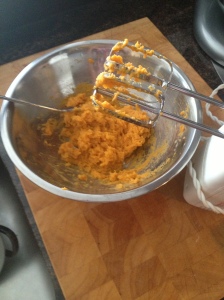
‘Mashed’ with a hand blender to make it ultra smooth.
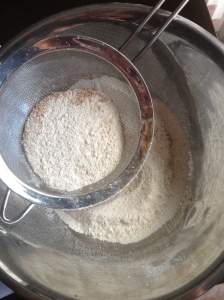
In a medium bowl, I sifted together flour, baking powder, salt, cinnamon and nutmeg. I did not add ANY sugar to this recipe. It definitely doesn’t need more sugar. You could use all -purpose flour or peanut flour for this recipe too.
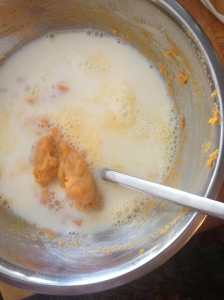
Next, in a separate medium bowl, I mixed mashed sweet potatoes, eggs, milk and butter.
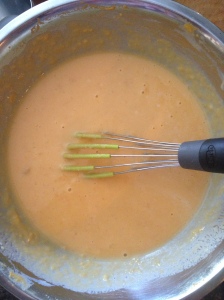 Blend sweet potato mixture into the flour mixture to form a batter. The mixture took a bit to combine and I used a whisk to bring it all together. Careful of splashing that milk around! I got it all over the counter.
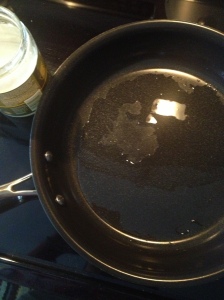
Next, preheat a lightly greased griddle over medium-high heat. I used organic coconut oil. Man, that was the best decision of the day. The light coconut oil flavoured the pancakes beautifully and they were not greasy at all. Perfect combination! There are not many things I like to cook in coconut oil, but this one is being added to the list. Score.
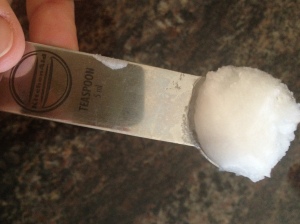
Coconut oil for greasing
Melted coconut oil
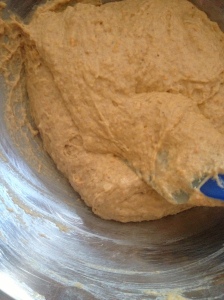
Pancake batter
The batter was a BIT thick the first time I tried to pour the pancake. I added a bit of extra milk after to thin it out. You basically just have to move the batter around in the pan with a spoon for spatula to get it to shape. Otherwise you’ll end up with a big blob.
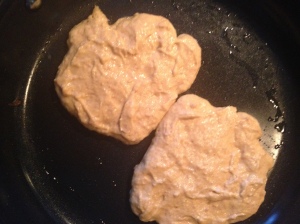
In the pan!
Alrighty! We are making progress. My pancakes didn’t stick AT ALL. They moved around quite quickly in the pan. I waited until I saw the edges bubble then flipped. Just check the bottom of it to your desired doneness, and flip!
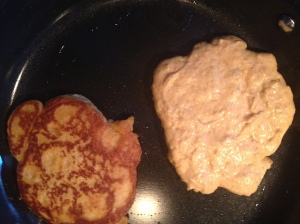
Flip!
Now let’s see how they turned out! I put a small dab of butter and a bit of syrup. I loooove butter. The pancakes were crispy on the edges and cooked perfectly inside. They are definitely more dense than your regular box-pancake but I’m okay with that. I think the whole-wheat flour attributed to that.
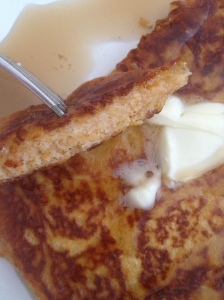
The finished product
I ate two for breakfast and cooked the rest of the batter. I stored them in a container, and popped them in the fridge. This morning (day after) I took one out, and put it in the toaster. It was perfectly warmed while still being crispy on the outside. I can’t wait to have another for lunch 🙂 Great on-the-go breakfast too!
As for my run later.. I had a really big salad for lunch with my fresh fenugreek sprouts (see post here). Ahh so tasty. I had a small sandwich later in the afternoon because I got hungry. Ended up going for a 3k run at 7pm. My shins were still really sore from my run two days ago, but I made it. I didn’t like it, but I made it. I felt I had enough energy, but probably should have eaten more during the day. Today is a rest day since I have softball tonight, that will warm my legs up! Hoping to hit the road again tomorrow, maybe I’ll try a lunch run. –
Thanks for reading! I hope you enjoy the pancake recipe. Do you have any fun sweet potato recipes you’d like to share? Post a comment!
Enjoy!
![IMG_2999[1]](https://foodiefunfitness.files.wordpress.com/2014/02/img_29991.jpg)
![IMG_3003[1]](https://foodiefunfitness.files.wordpress.com/2014/02/img_30031.jpg)
![IMG_3002[1]](https://foodiefunfitness.files.wordpress.com/2014/02/img_30021.jpg)
![IMG_3006[1]](https://foodiefunfitness.files.wordpress.com/2014/02/img_30061.jpg)
![IMG_3008[1]](https://foodiefunfitness.files.wordpress.com/2014/02/img_30081.jpg)
![IMG_3011[1]](https://foodiefunfitness.files.wordpress.com/2014/02/img_30111.jpg)
![IMG_3013[1]](https://foodiefunfitness.files.wordpress.com/2014/02/img_30131.jpg)


