Healthy Gluten/Dairy/Sugar-Free Chewy Granola Bar Recipe

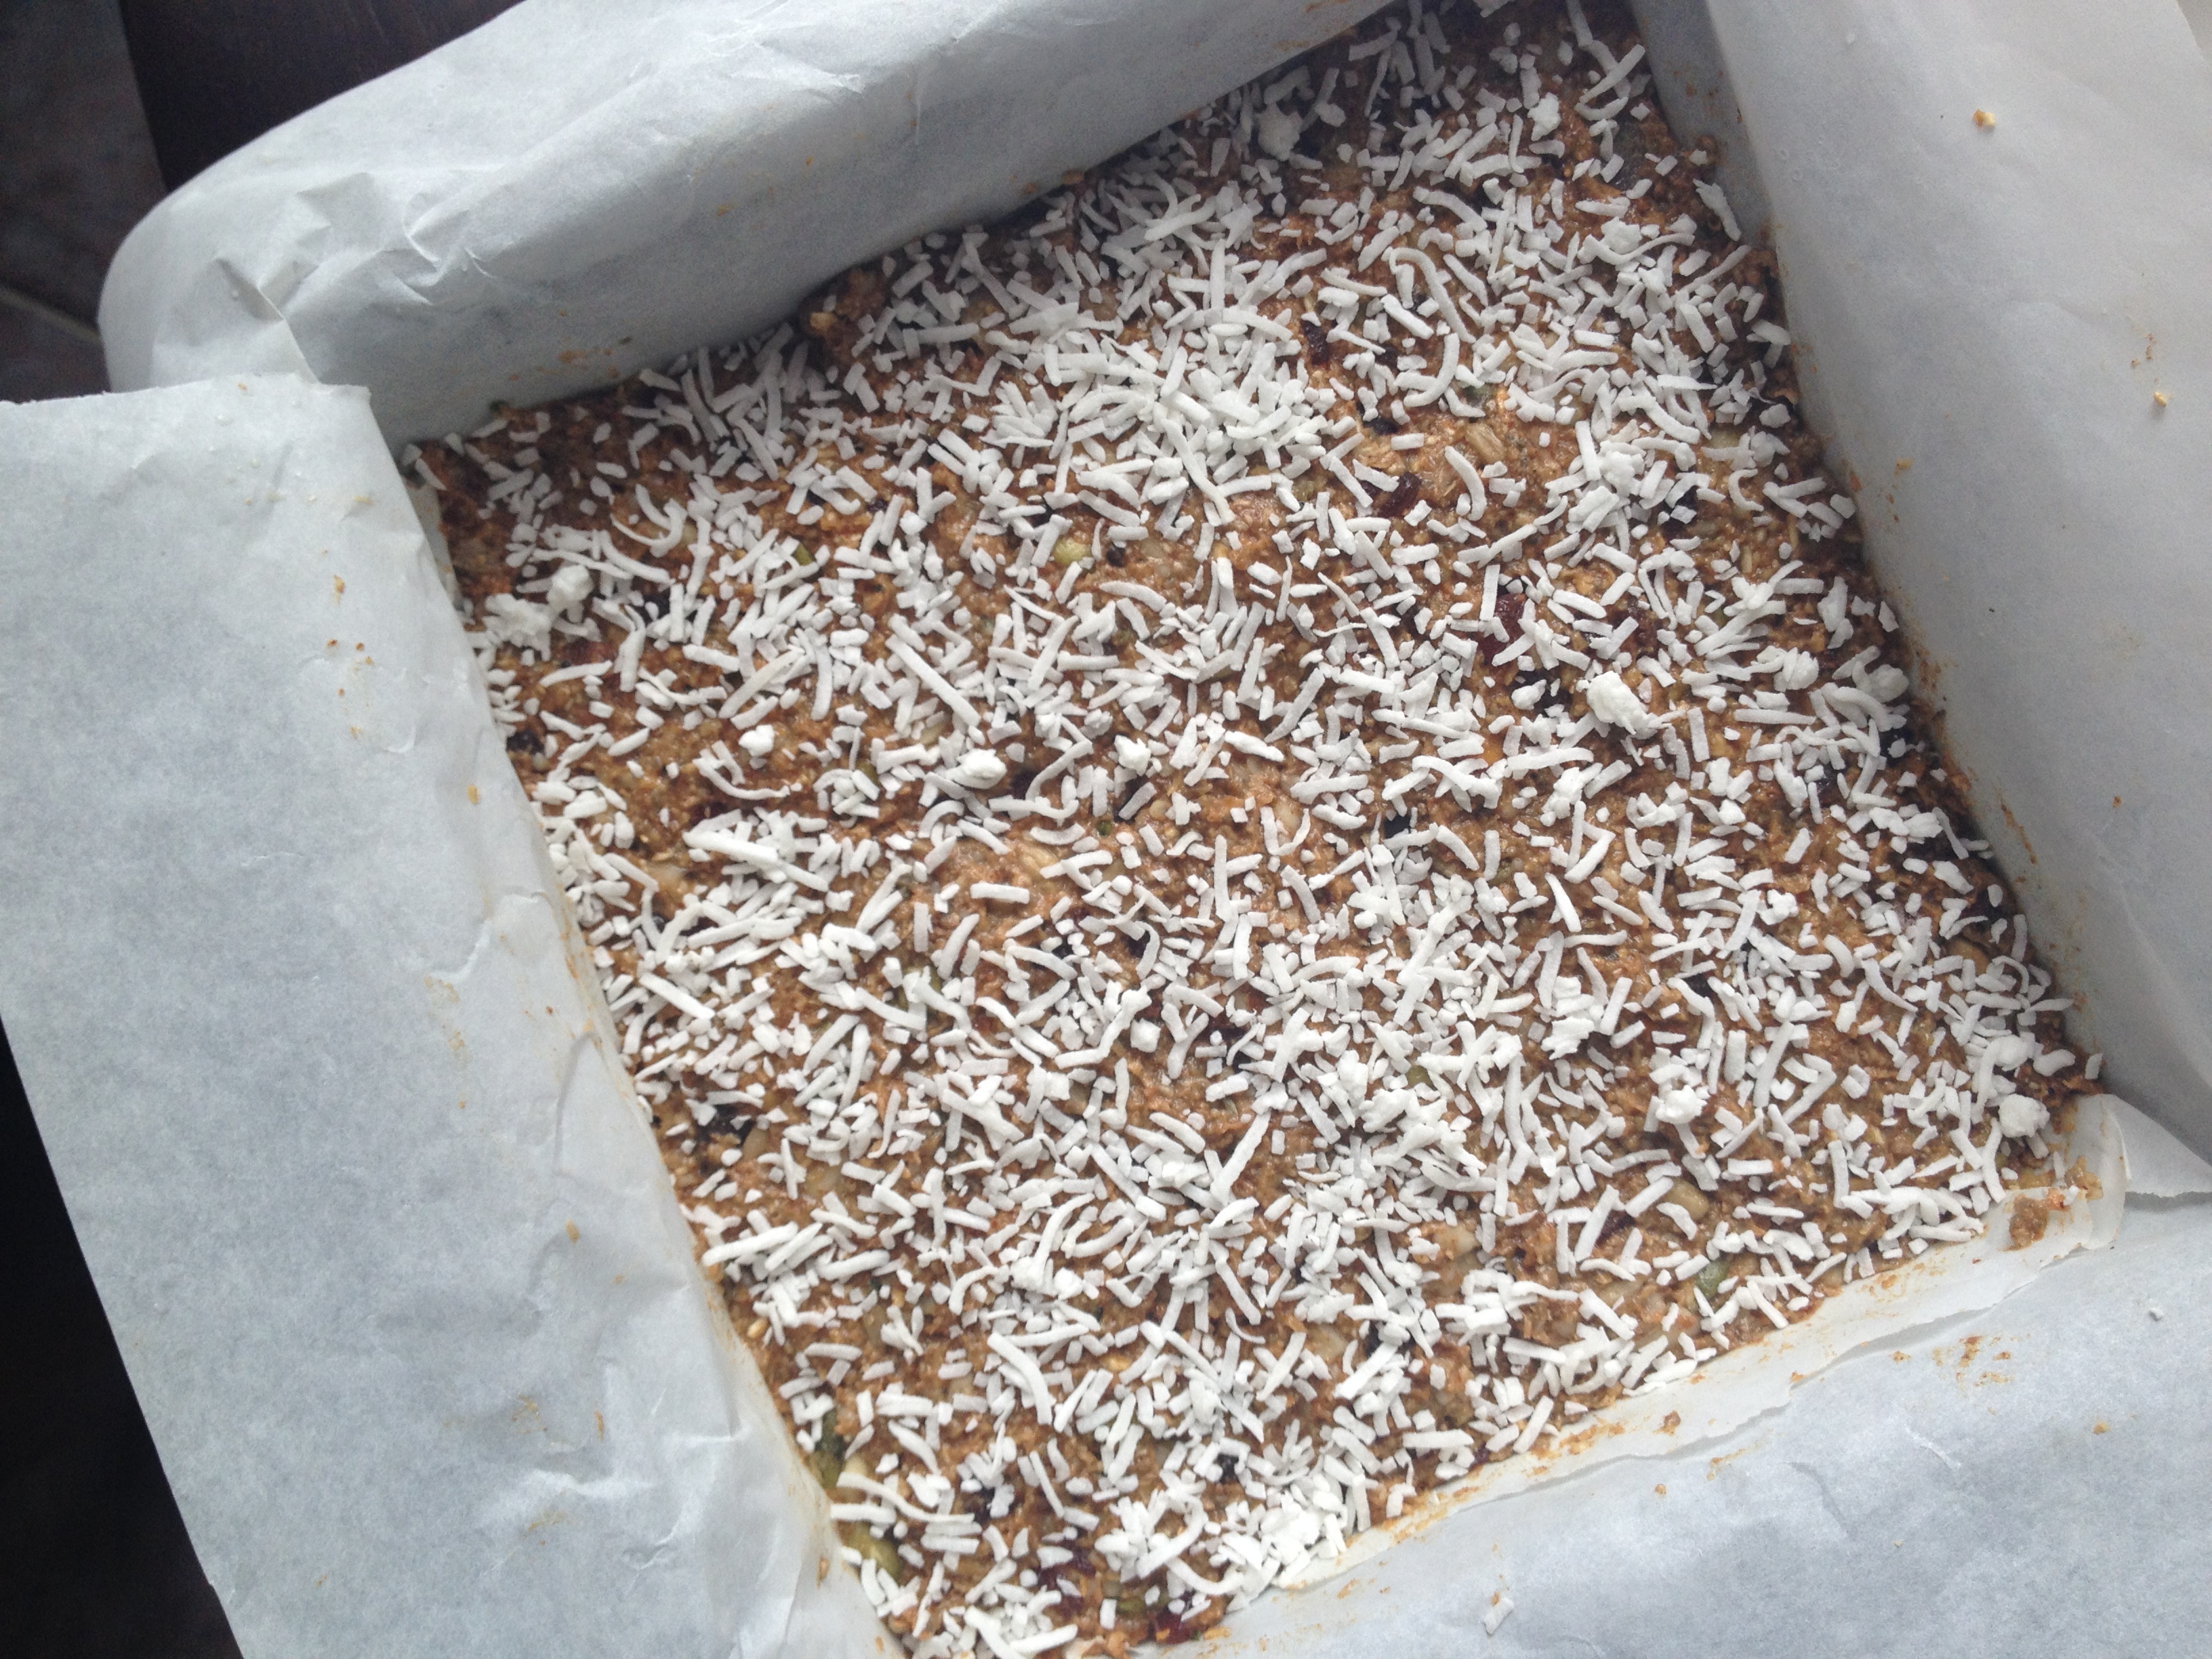
I’m always on the hunt for the next awesome granola bar recipe. I love experimenting with new ingredients! I read through a handful of recipes this week and decided to mash them all together and make my own, like usual. This recipe didn’t disappoint. I love that it uses ground up oats for oat flour, and pretty much every seed I had in my pantry. The other thing I loved, is it used the majority of the dates that I had sitting on top of the fridge as the binder. Blending the dates in water creates a paste that acts as a binder with the oat flour. It’s perfect and sweet without any added sugar. Woot! Seriously addictive and the perfect snack for my purse. For a little added visual appeal, I sprinkled unsweetened shredded coconut on top. Now they look perty.

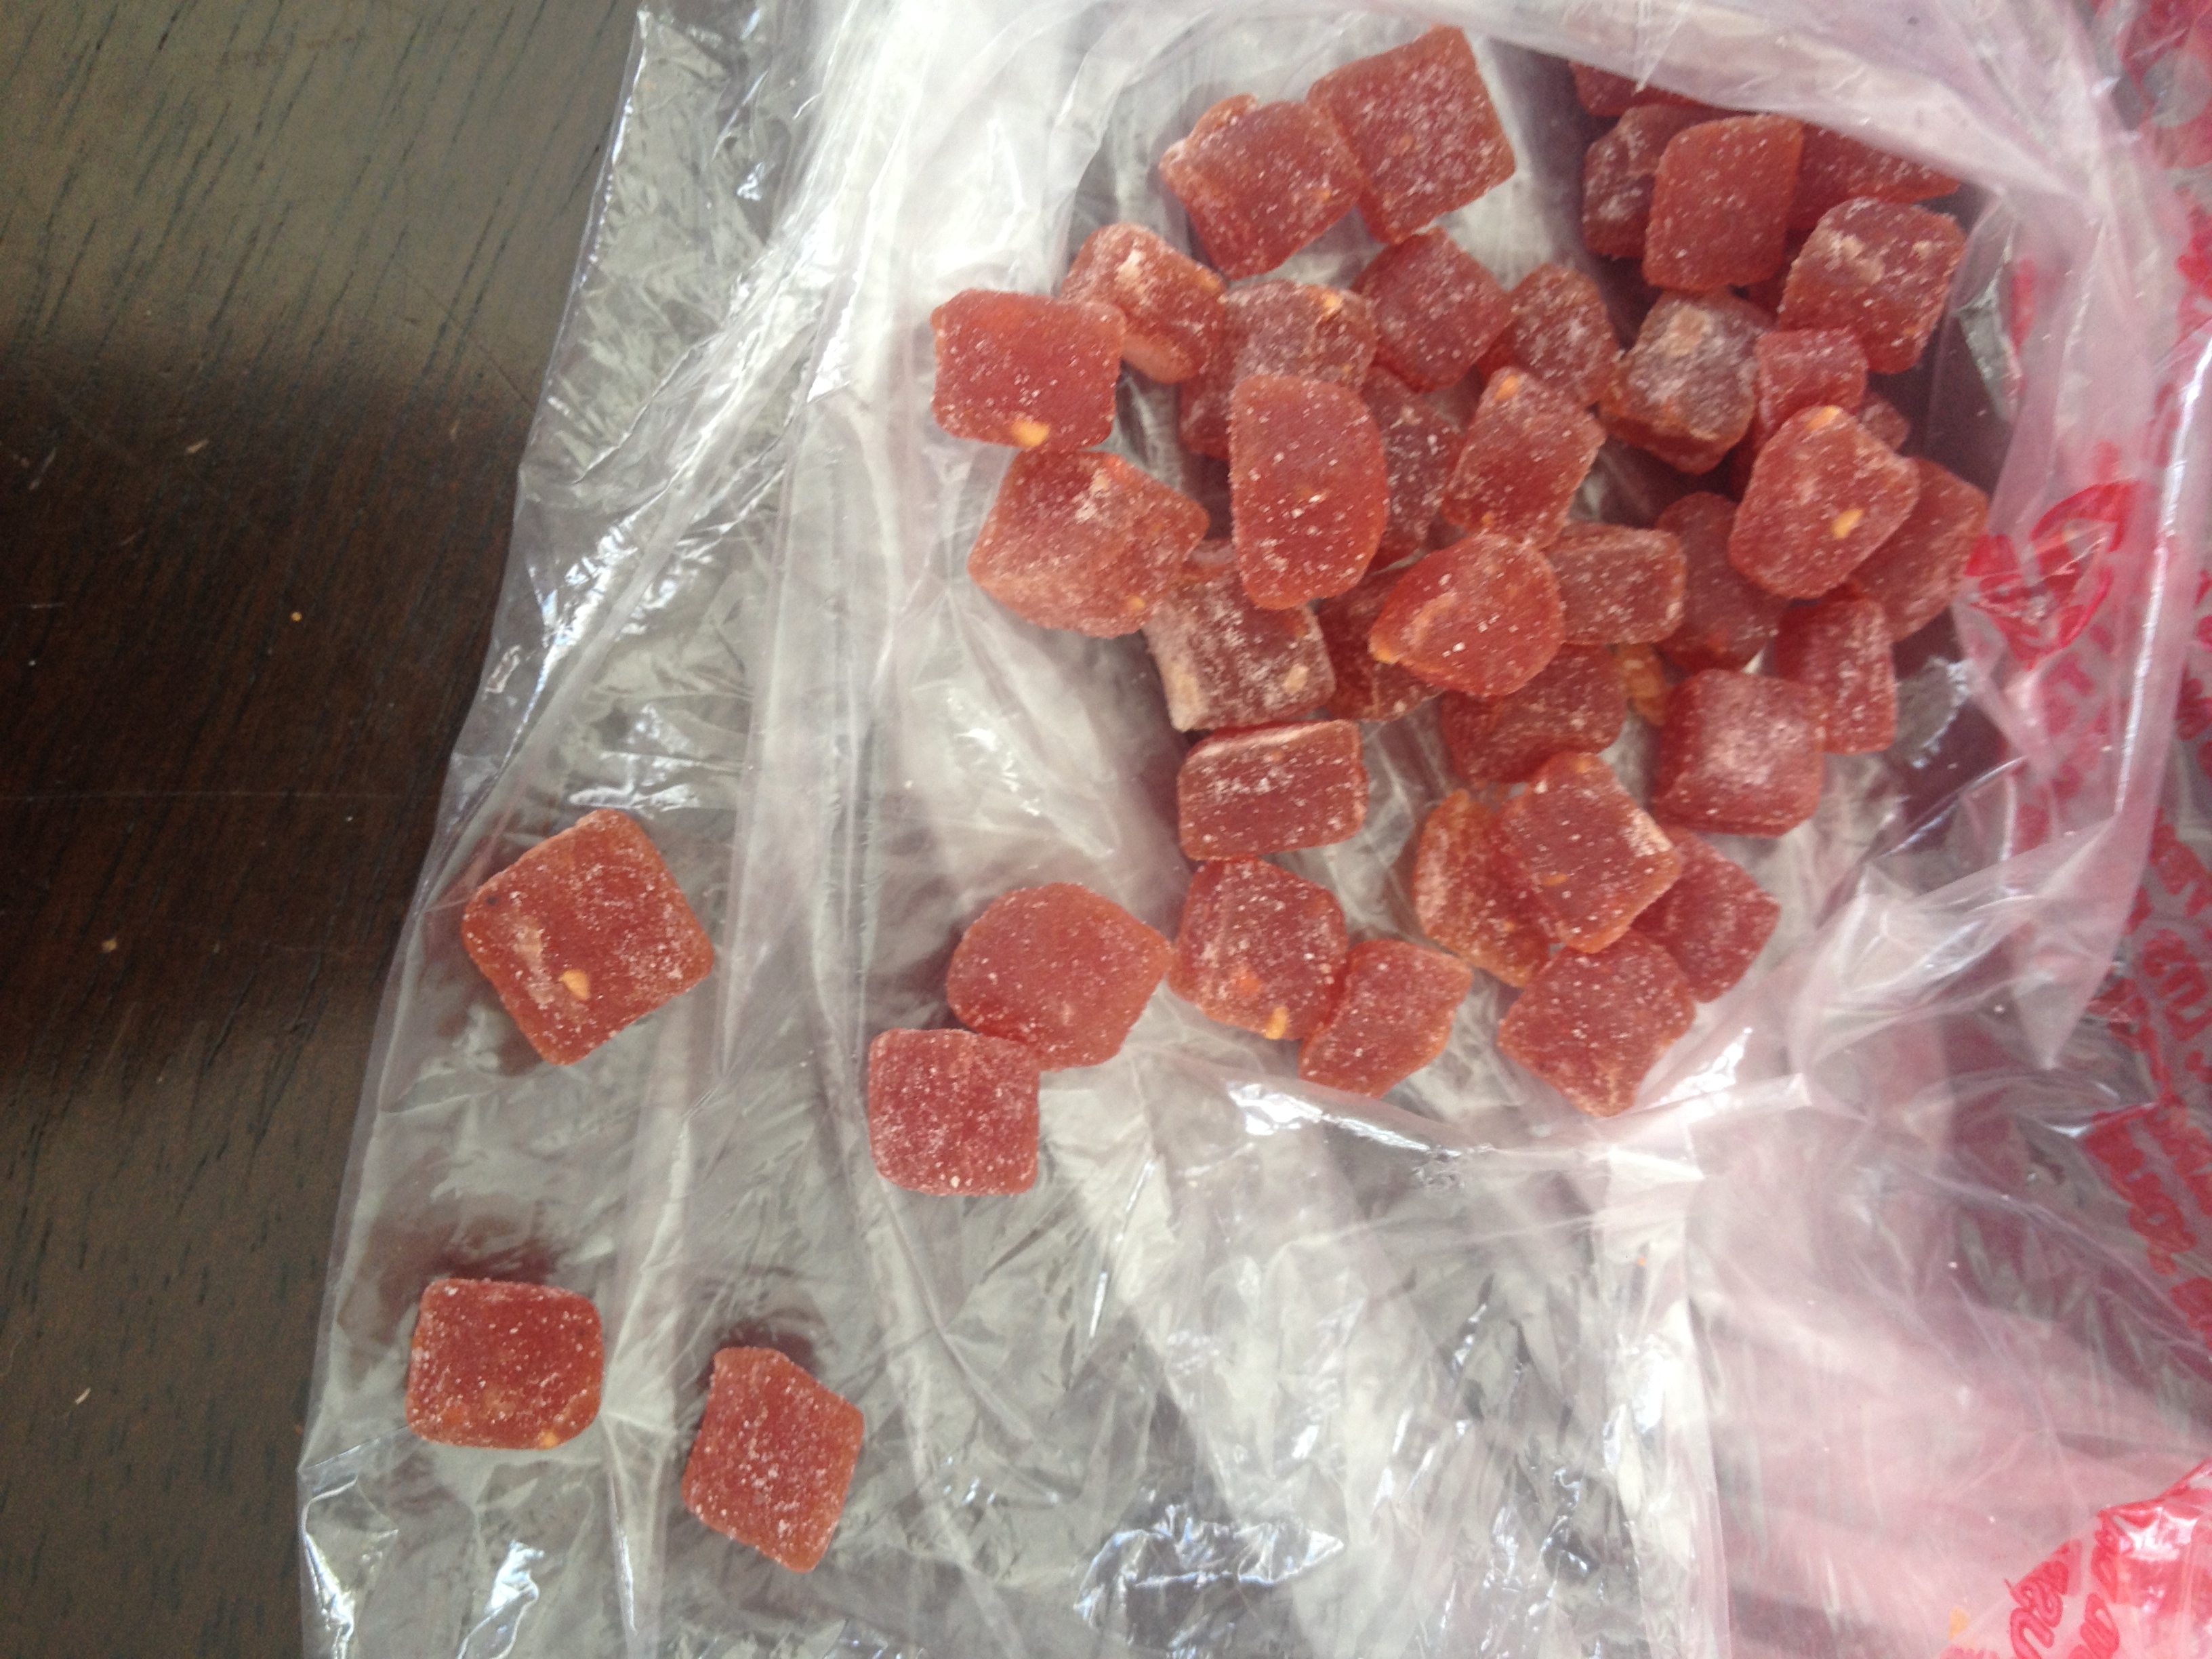
Here are the little squares of fruit that I picked up at the Bulk Barn. I can’t for the life of me remember the name of them, they have strawberry, raspberry and mango – and they’re pressed together with other fruit. I liked the way they looked so I bought a small bit of them to try in this recipe. The kind I used is the raspberry ones.

Dried fruit

I use an 8 x 8 baking pan instead of the 9 x 11 glass baking dish because I wanted the bars to be square instead of rounded at the corners (I am very specific about how my baking comes out, okay! :)). I had some left over after pressing it into the square pan (didn’t want them to be too thick) so I decided to make mini bites out of the leftover and used the mini-muffin pan.

When lining the pan, overlap your parchment paper so it covers each side. Much easier to remove and prevents breaking after they’re cooled.

In the pan


Mini


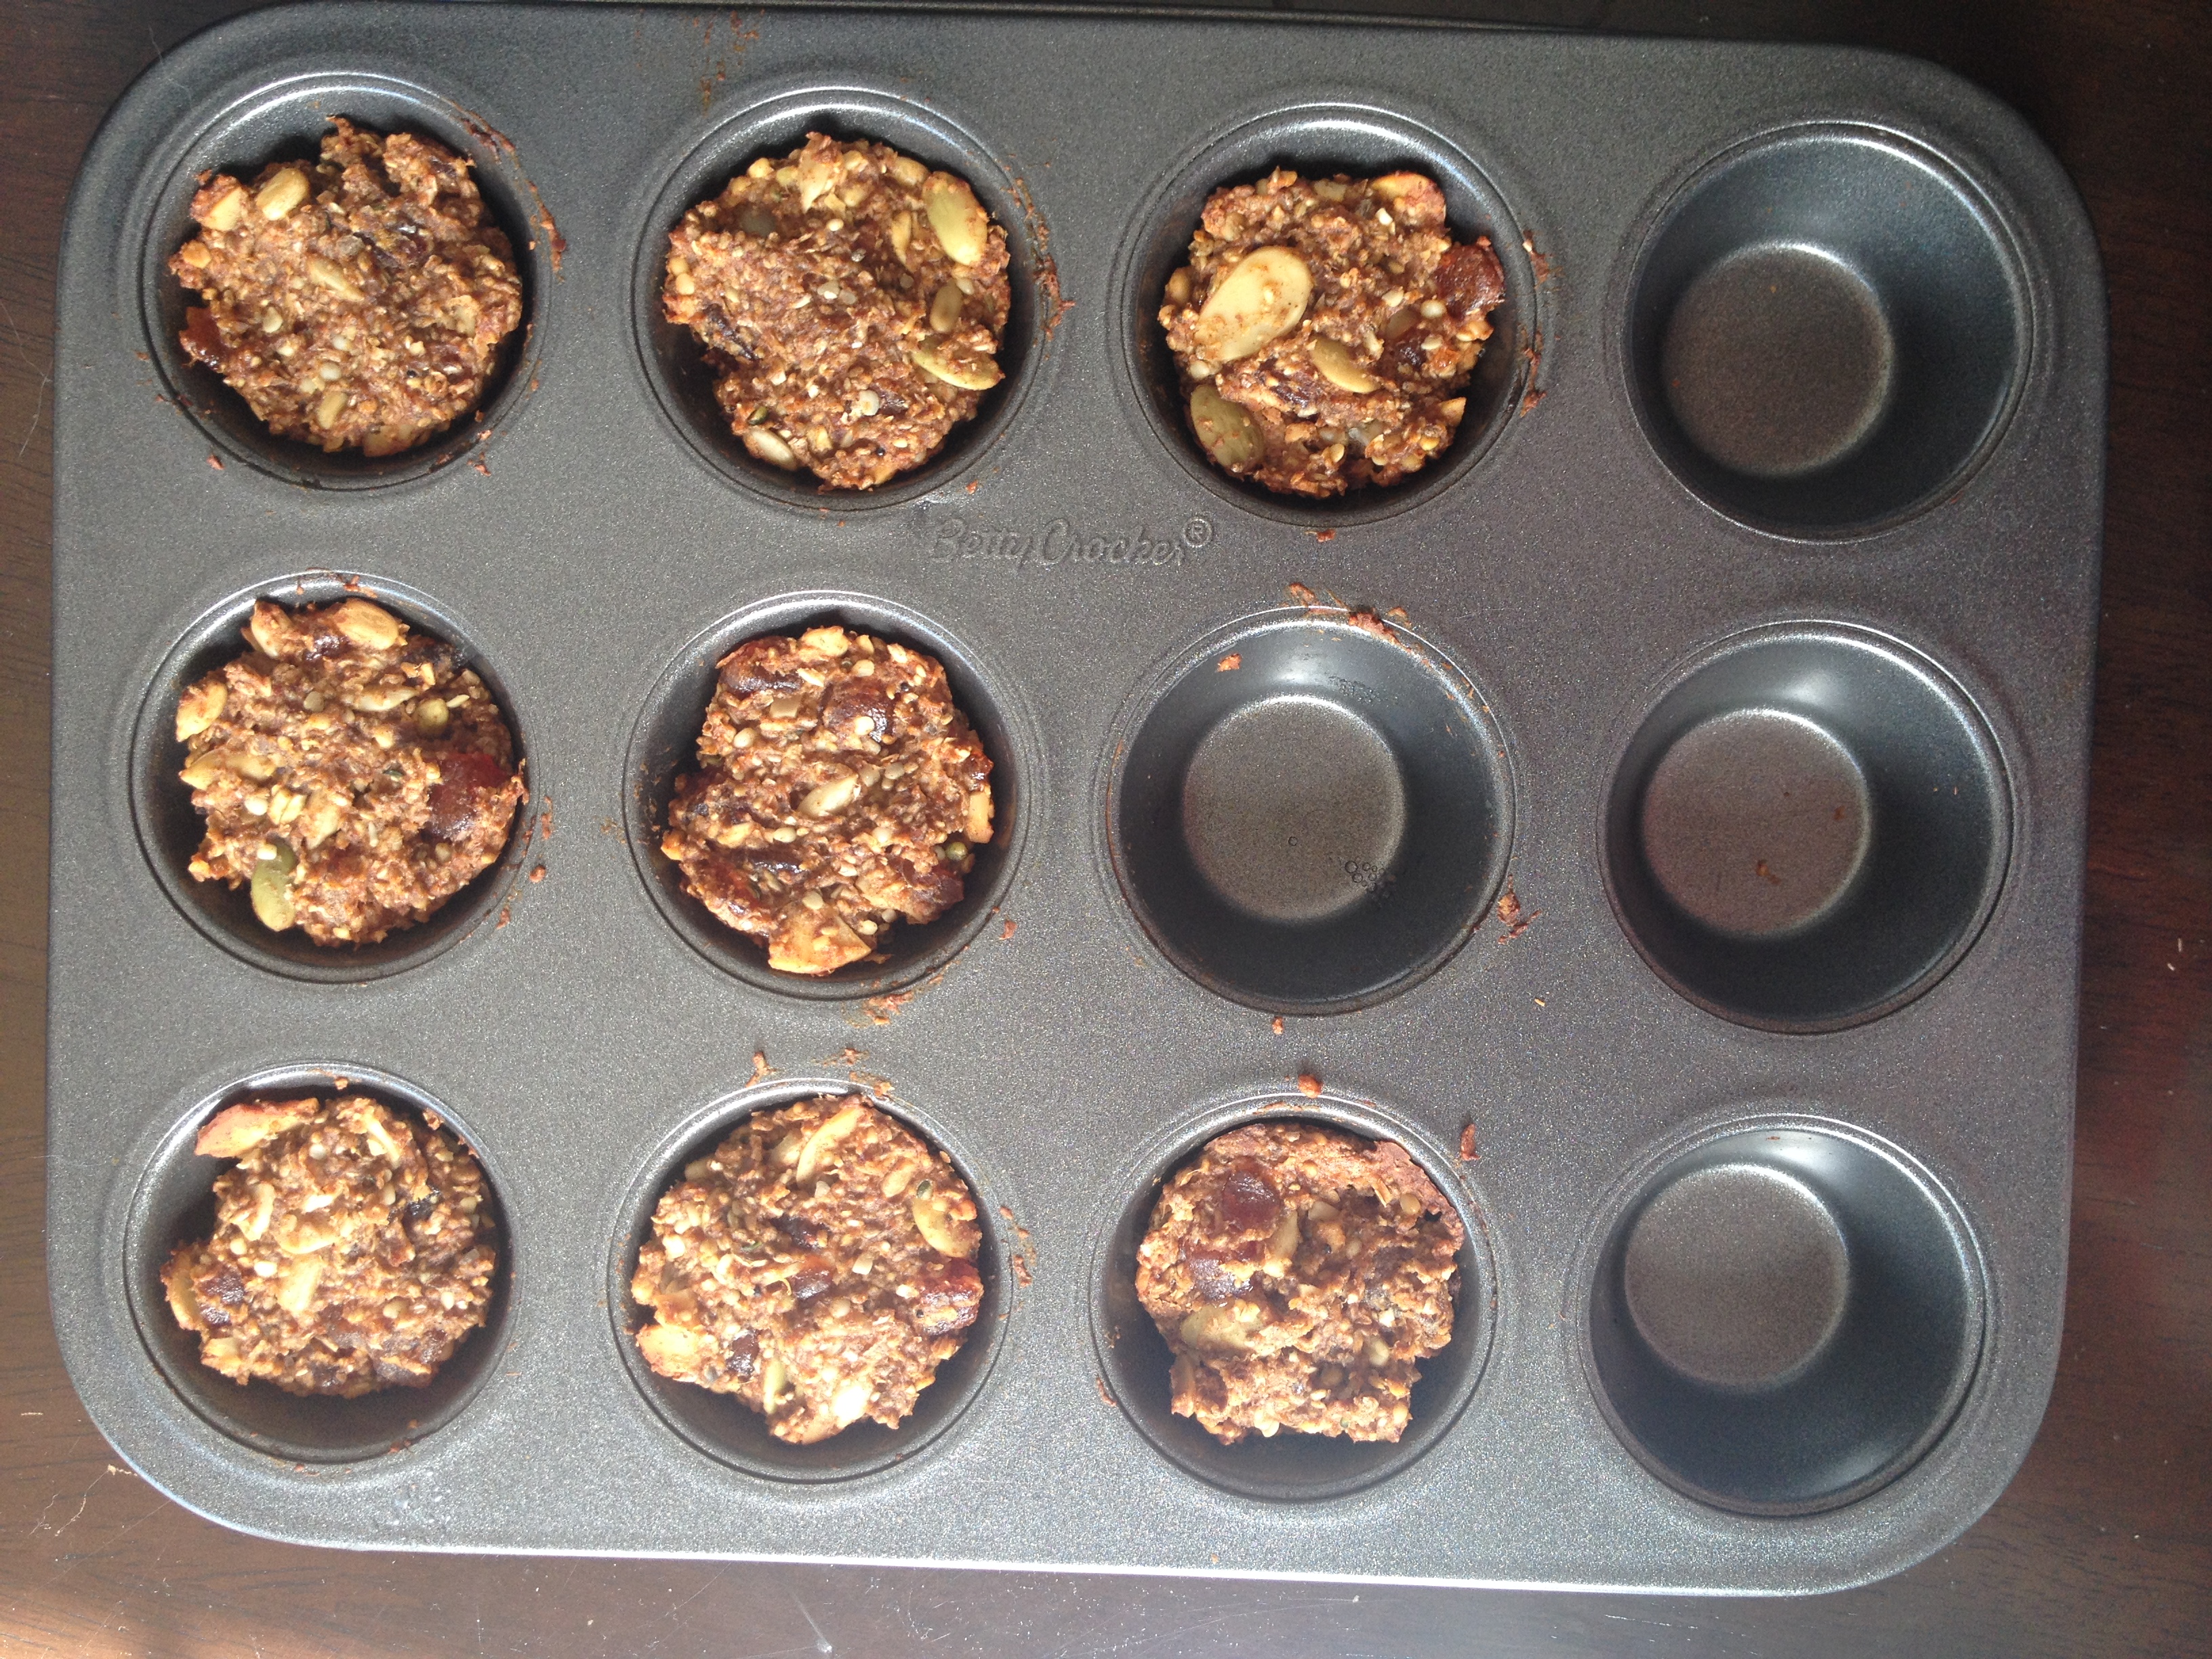
I baked them for about 15 minutes and they came out PERFECT. I threw a couple in a ziplock and into my purse they went. Nice easy bite-sized snack.

IMG_3176[1]


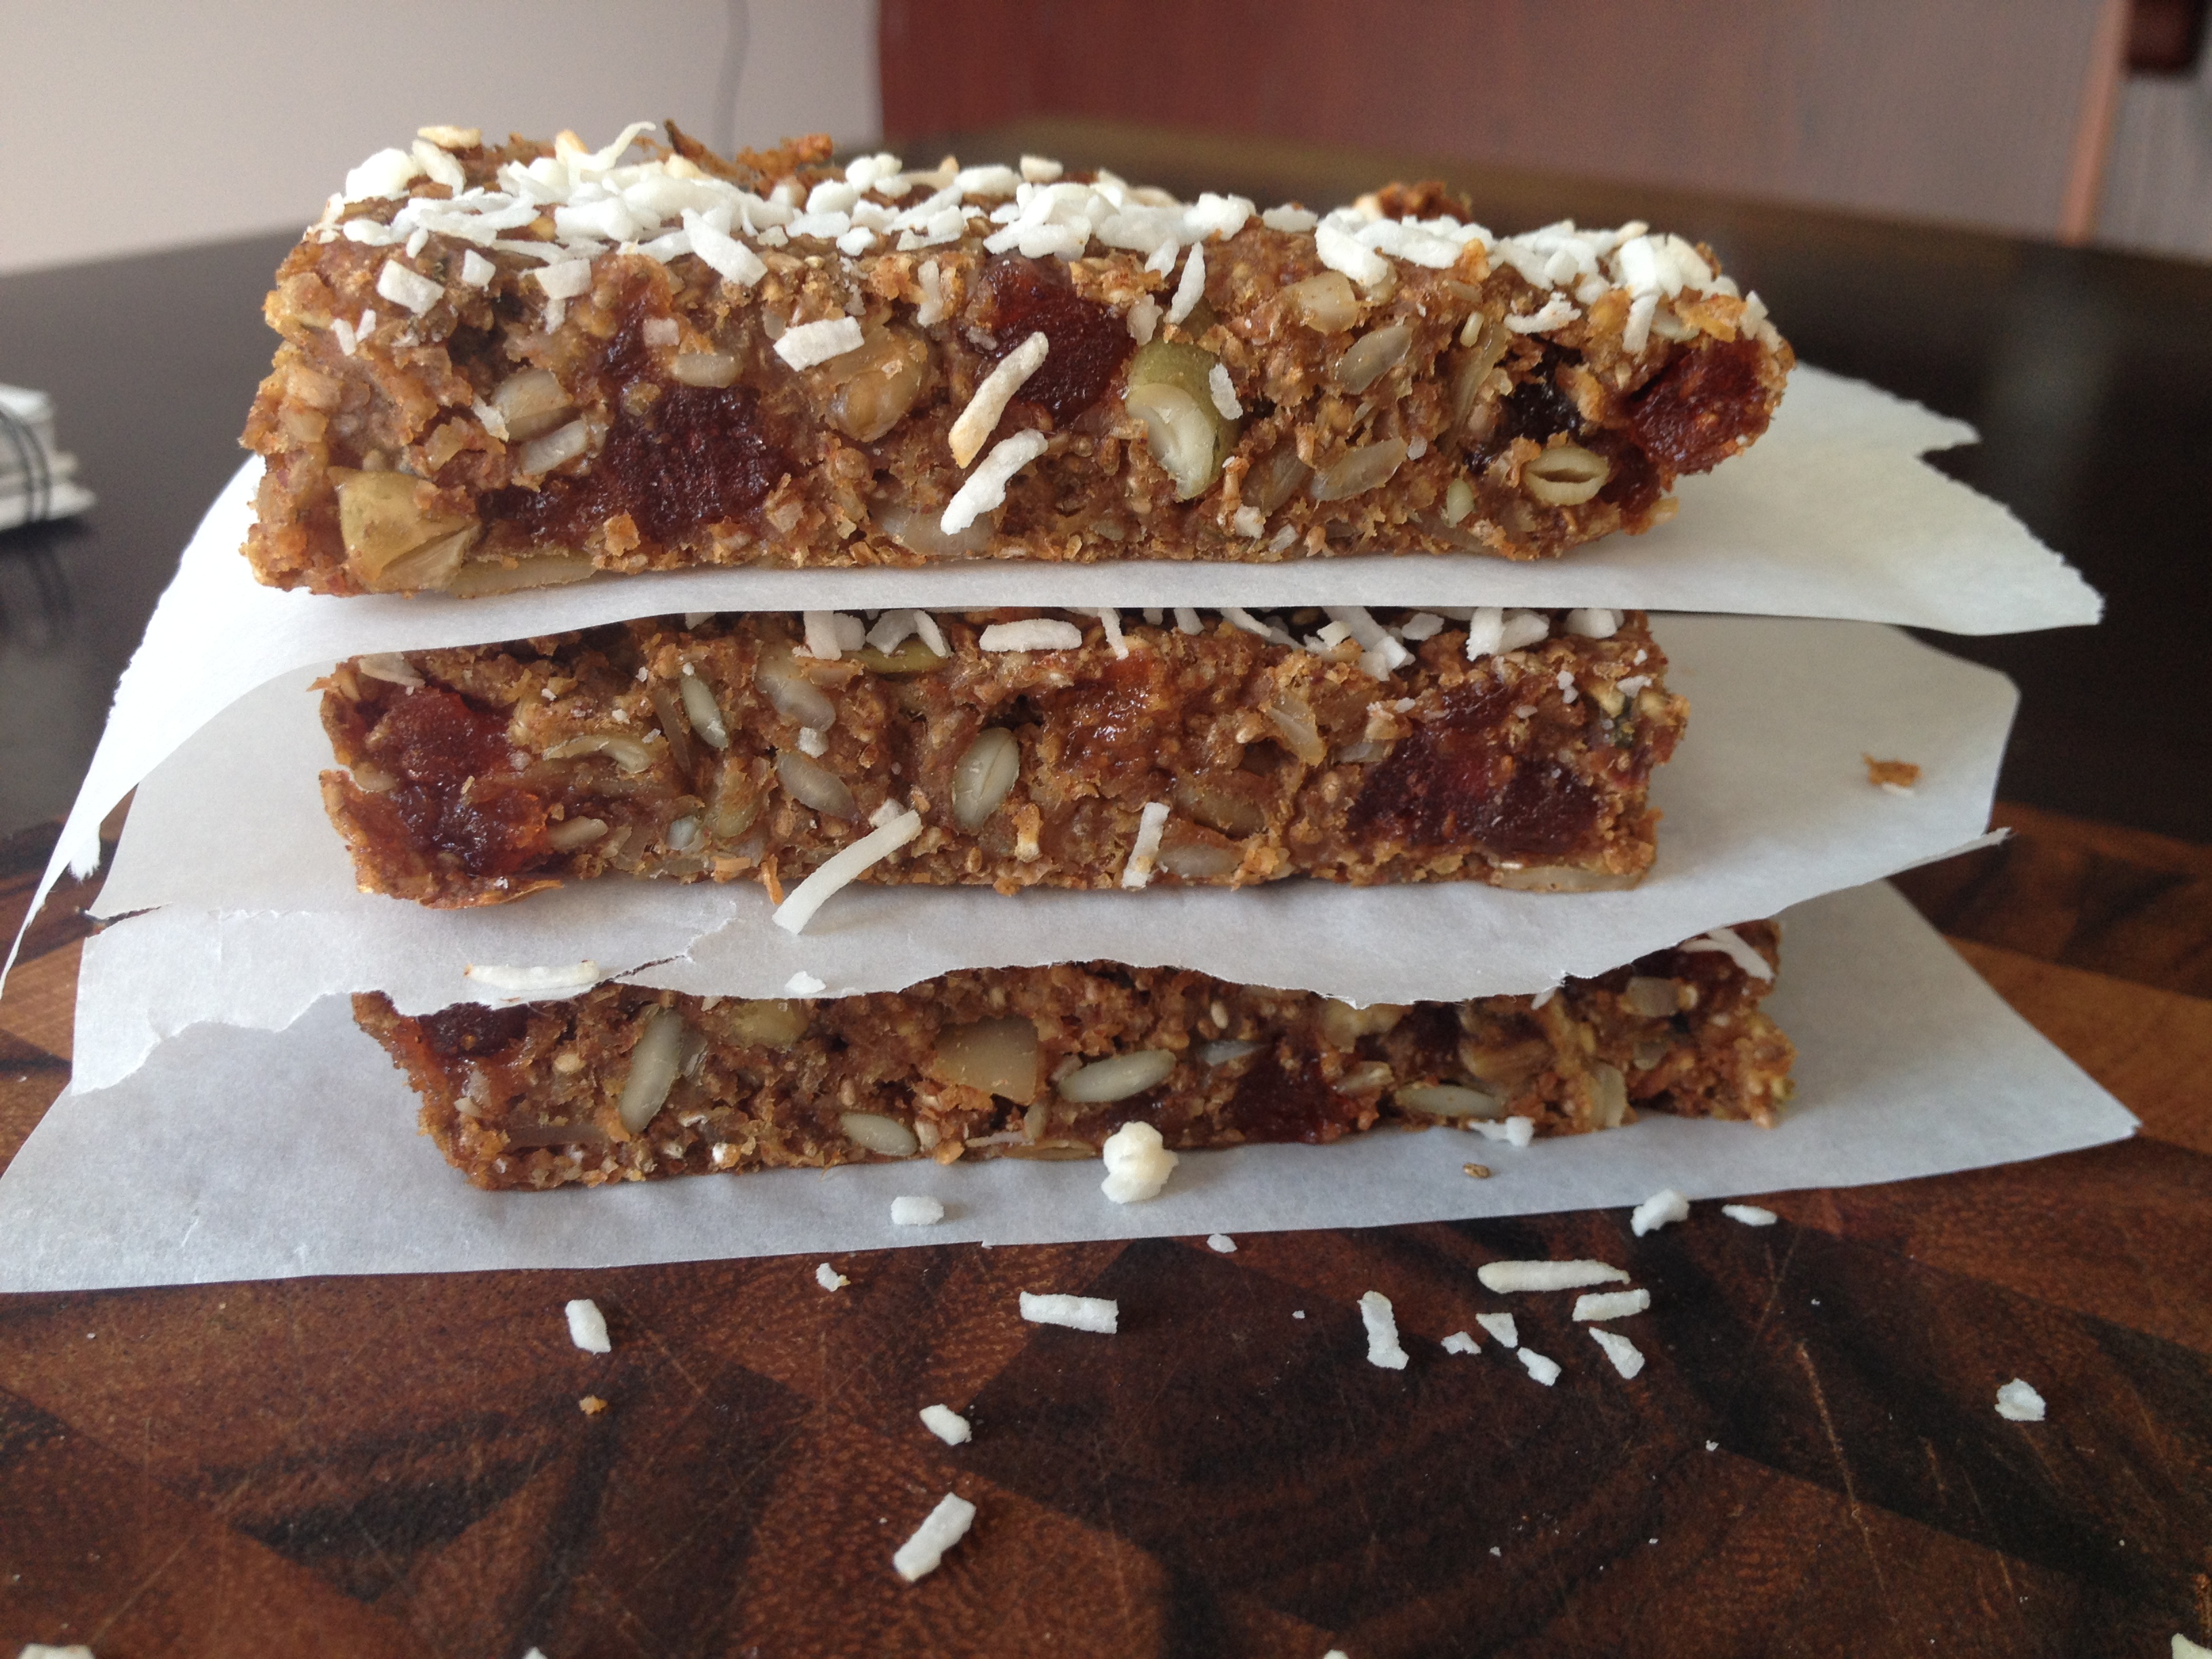
After the original batch finished baking, I let them cool (DO NOT SKIP THIS STEP) and then cut them into bars!

IMG_3163[1]


Mmm… just perfect. They were easy to cut and even easier to eat! Enjoy!

Finished product


Ingredients:
• 3/4 cup gluten-free rolled oats, ground into a flour
• 1 cup water
• 3/4 cup packed pitted Medjool dates
• 1/2 cup chia seeds
• 1/4 cup raw sunflower seeds
• 1/4 cup raw pumpkin seeds
• ¼ cup red oat bran
• ¼ cup hemp seeds
• ¼ cup sunflower seeds
• 1/2 cup dried fruit of your choice, chopped to desired size
• ¼ cup your favourite nut butter (I used almond)
• 2 teaspoons cinnamon
• 2 teaspoons pure vanilla extract
• 1/4 teaspoon fine grain sea salt

Directions:
1. Preheat oven to 325F and line a 9-inch square pan with two pieces of parchment paper, one going each way.
2. Add rolled oats into a high-speed blender. Blend on highest speed until a fine flour forms. Add oat flour into a large bowl.
3. Add water and pitted dates into blender. Allow the dates to soak for 30 minutes if they are a bit firm or your blender has a hard time blending dates smooth. Once they are soft, blend the dates and water until super smooth.
4. Add all of the ingredients into the bowl with the oat flour and stir well until combined.
5. Scoop the mixture into the pan and spread it out with a spatula as evenly as possible. You can use lightly wet hands to smooth it down if you need to.
6. Bake at 325F for about 23-25 minutes, or until firm to the touch. Let cool in the pan for 5 minutes and then lift it out and transfer it to a cooling rack for another 5-10 minutes. Slice and enjoy! I suggest freezing leftovers to preserve freshness.

Very Berry Spelt Multi-Grain Muffins

Well after that sugar rush of caramel corn last night (I had a handful then had enough), I am craving muffins today.  Multi-grain berry muffins.  I am not a muffin girl and when I do eat a muffin, it’s never the fruit kind but for some reason today, I want a wholesome soft, fluffy fruit muffin. I’m looking forward to having this in the morning, cracked open, drizzled with yogurt and sprinkled with nuts and chia seeds. Perfect breakfast? I think so!

I enjoy the flavour of spelt flour along with the hard wheat red bran in this recipe. In half the batch I threw in some cacao nibs just ‘cause.  This recipe will be sure to satisfy your whole grain and sweet tooth all at the same time!

IMG_2999[1]

IMG_3003[1]IMG_3002[1]IMG_3006[1]IMG_3008[1]IMG_3011[1]IMG_3013[1]

Ingredients:

2 c           spelt flour

½ c          yellow corn meal

½ c          hard wheat red bran

1/3 c      lightly ground flax seeds

¼ c          chopped walnuts

2 tbsp    sesame seeds

1 ½ tsp  baking powder

1 tsp      baking soda

1 tsp      ground cinnamon

½ tsp     pink Himalayan sea salt

Small handful of chocolate chips (optional)

2              large eggs

1 c           orange juice

½ c          organic coconut oil

½-¾ c     agave

1 tsp      vanilla extract

1 ½ c      mixed frozen berries, thawed

1 tbsp    rolled oats

1. Preheat the oven to 325 degrees F. Line a medium-sized muffin tin with your favourite cupcake liners.

2. In a large bowl, combine the spelt flour, cornmeal, oat bran, flax seeds, chopped walnuts, sesame seeds, baking powder, baking soda, cinnamon, and salt.

3. In a smaller bowl, whisk the eggs lightly. To the eggs, add the orange juice, coconut oil, agave and vanilla, whisking until they are well combined. Pour the wet into the dry and whisk just until blended. Mix in the berries (and the juice they produced when defrosting) and cacao nibs (if using).

4. Spoon the batter into the prepared muffin tins, filling the muffin cups almost to the top. Top each muffin with a sprinkling of the oats. How pretty!

5. Bake for 18 to 25 minutes, or until the muffins are deep golden brown and spring back lightly when pressed gently in the center and a toothpick comes out clean.

Enjoy my friends!

Worth The Wait Focaccia!

In addition to my bread obsession, I have discovered a love of fresh homemade focaccia.  If you have never tried to make this wonder-bread before, you must try. It is SUPER simple, but takes patience as does any good bread. You can however, make a quick version of it and it will be great but if you’re looking for the moistest, fluffiest and most flavourful focaccia? Well you had better take a nap, find a hobby or play some video games while you wait. The good news is that most of the waiting can be done overnight, so just find something to do for 3 hours or so 🙂

This recipe is not mine, I found it while scouring online and OH MY am I ever glad I tried it and am thrilled to share it on my blog.  It is now filed in my ‘keep’ list because it’s just absolutely perfect. I’ve made it once and will be making it again for an upcoming family gathering. Caution: people WILL swoon.

in the tray

I had some crispy garlic infused oil from some Filipino garlic rice I made recently, and I decided to throw it into the dough mix right at the beginning. Excellent idea! (Pats self on back).  If you have any infused oil that you like, I suggest adding it to the mix. It adds another dimension of flavour you can’t get from just adding fresh/dried herbs to the top of the dough before baking. Don’t add too much, I’m talking a 1tbsp or two at max.

The tray

The rest of the directions in the recipe I followed to a T. I did let it rest from 9pm at night until 11am the next morning before starting to ‘turn’ the dough. It had plenty of time to ferment and create oddles and oodles of delicious pillowy bubbles. Right before baking, I halved some cherry tomatoes and carefully pushed them into the dough. I picked some fresh rosemary, sprinkled it on top along with some chopped kalamata olives and thinly shaved red onion.  I finished it off with a sprinkle of coarse sea salt and popped it in the oven.

close up

My batch was the perfect size.. I think I was able to get over 30 pieces from the rectangle tray. Only three pieces were left over at the end of the night. It was a HUGE hit, and I know it will be in your home too!  Thank you SO much to Jenny for posting this recipe on her awesome blog, which I recently discovered. You will want to bookmark her page folks, she’s a keeper! 🙂 To find the full recipe, click here.

3

Three perfect pieces

Stuffed peppers with nut-free purple pesto rice and baked eggs

Last week I experimented with a fun dish: stuffed peppers.  I had a vision for this dish, and it came together beautifully.

I was able to incorporate the awesome nut-free purple pesto I made last week, some left-over pulled pork that was in the freezer and the last of the home-made tomato sauce. The resulting dish was an awesome combination, and everyone cleaned their plates at dinner. There’s nothing more satisfying as a cook, to see your guests almost lick the plate, right?

You can adapt this recipe to be vegan, vegetarian or full on meat-lover. Whatever you choose, I promise you’ll love it to bits.

Ingredients

  • 4 peppers cut in half (red, orange, yellow or a combo of all three!)
  • 1.5 cups basmati rice, cooked
  • 2 tbsp of nut-free purple pesto, or whatever pesto you have on hand
  • 2.5 cups homemade tomato sauce, or canned tomato sauce, heated
  • 4-5 eggs (depending on how many you’re feeding that night)
  • 1 cup of chopped/shredded cooked meat (your choice or none at all)
  • 1 cup Shredded mozzarella cheese
  • 2 green onions or chives, finely chopped
  • 6-10 leaves of finely chopped basil
  • Salt and pepper to taste

Directions:

  1. Preheat oven to 375 degrees.
  2. Cut peppers in half length-wise, from stem to bottom. Remove seeds and white parts, wash and dry.
  3. Place cut peppers on a plate and microwave until cooked. About 5 mins depending on how many you have). You want them to be soft, but not mushy. They will continue to cook when stuffed and baked in the oven.
  4. In a medium bowl, combine basmati rice and pesto. Mix until combined. Taste for seasoning, adjust as needed (add salt, pepper or even some parmesan cheese).
  5. Place halved peppers in the bottom of a deep baking dish.
  6. Take 1-2 tbsp of rice and layer on the bottom of each half of pepper.
  7. Take cooked meat and make another layer on top of the rice on each half of each pepper.
  8. Crack one egg into each half of each pepper.
  9. Cover and bake stuffed peppers in oven for 10-12 minutes until whites of eggs are cooked and the yolk is semi-firm.
  10. Remove from oven and finish eggs with shredded mozzarella cheese, chopped basil and chopped green onions,

To plate: pour heated tomato sauce on a plate. If you have leftover rice, add some on top of the tomato sauce.

rice

tomato sauce and rice

Place the stuffed peppers on top of the tomato sauce/rice.

Plated

cut open

Finish with cracked black pepper.

Meatless Monday – Carrot Banana Zucchini Loaf

I’m a big fan of banana bread. I almost never make it because of all the sugar that the recipes usually call for.  This past weekend, I was searching for ways to use the 10lb bag of carrots I bought (yes, a 10lb bag, they were on sale and I’m a sucker for sales) and came across a Carrot-Banana loaf recipe. It got me thinking… I’ve made ‘Morning Glory’ muffins before and figured why couldn’t I make a loaf, but without all the sugar?

This recipe is vegan, and can be gluten-free if you want.  I didn’t have any gluten-free flour on hand, so I used whole wheat instead. 

I absolutely LOVED how this turned out.  Beware that it is a pretty dense loaf, with all the banana, carrot and zucchini jammed into it. It’s also pretty moist, so don’t be afraid to pull it out at the 25 min mark. I just kept inserting a knife in the middle to check done-ness. You may need to cook a little less or a few minutes more, depending on your oven. (So what I’m really saying is just keep checking it lol).

Two slices of this keep me full for a couple of hours. Adding dried fruit is optional in this bread.  I didn’t add it because I don’t like dried fruit in my bread, but the option is there if you’re weird like that and do.

Ingredients:

  • ½ cup organic raw honey
  • 3 tablespoons organic olive oil
  • 1 teaspoon vanilla
  • ½ teaspoon salt
  • 1 cup mashed organic ripe bananas (usually two bananas)
  • 1 finely shredded zucchini
  • 1 cup grated organic carrots (I used 1.5 cups in this version)
  • ¼ cups freshly squeezed lemon juice (usually half a lemon)
  • Zest of 1 lemon
  • 2 cups Organic gluten free all-purpose flour (or whole wheat if you aren’t doing gluten-free)
  • 2 teaspoons baking powder
  • ½ teaspoon baking soda
  • ½ cup chopped organic dried apricots (Optional, eww)
  • ½ cup organic chopped nuts of your choice (I used walnuts)

Directions:

  1. Preheat oven to 350 degrees. Grease 3, 3” X 6” loaf pans (I only had to use two disposable tin ones, the No Name ones from No Frills)
  2. Using a fork beat the honey, oil, vanilla, and salt. Add the bananas, carrot, zucchini, lemon juice, and lemon zest. Mix the flour, baking powder, and baking soda into the banana mixture. Then fold in the nuts and apricots.
  3. Spoon into the loaf pans and bake for about 20-25 min, or until tooth pick comes out clean. Let it cool for about 5 min before removing from pan.

Moans for scones.

Yesterday B and I went out for Dim Sum with some friends. While nom-noming on delicious little items tucked neatly into steamers, my friend mentions that when we are all settled in our new homes (we’re moving a week apart from each other, in the same city) that I’ll have to show her how I made my baguettes. She promised to teach me how to make Filipino food, which I absolutely adore. There are so many dishes I haven’t even tried to recreate from my time in Manila, so I’m stoked to have a cooking lesson from her. I squealed at the thought of us cooking and baking together. Right then, then she whips her head around and says to me;

You’ll have to make SCONES!

Scones? Really? Hmm.

I don’t really recall meddling in the scone-zone. The only thing close I could recall were some cheddar jalapeno biscuits I tried out years ago, but that was when I first started exploring the kitchen and I just used Bisquick mix. Hardly a revolutionary recipe.

So this morning I woke up and I was on a mission. Scones day. Lots and lots of scones. Thing is, because we are moving we packed the kitchen yesterday and pretty much everything I’d need to use to bake them. Time to go digging.

I found a round cake pan, and decided that would work. I don’t own a scone pan. I didn’t even know they existed until today, thanks to the internet :).  I found my measuring cups and pulled out the flour. I had some dried cranberries in the pantry and figured I would make something with those, even though I’m not a fan of dried fruit in stuff. I really, don’t like dried fruit in anything.  Wait, I made white chocolate chip macadamia nut cookies with dried cranberries this past Christmas, but I only liked them because of the nuts and chocolates. Okay, the cranberries were pretty, but that’s about it.

So I did some searching and found the recipe I wanted to try. I landed on this really great blog called CravingThis. Here is the recipe.

I did make one alteration which was to use light cream instead of buttermilk. They turned out great with that change and were soft, light and fluffy. I actually like the cranberries in it because there isn’t too much of them and they are not overly sweet either which is what I was aiming for. The crust is nice and flaky and the lemon zest and juice add a really nice flavour to this scone. It’s kind of cake-like, which is fine by me. Definitely brush the top with an egg wash and sprinkle sugar on top before baking. You won’t be able to wait until they are cooled.

ImageImage

You thought that was it, right? Ha! Read on my friends 🙂  I used the lemon cranberry scone as a stepping stone to the next level and had my mind blown. (Yes I made that up).

I don’t like dried fruit, but I absolutely LOVE cheese. Next: Savory scones? Challenge accepted!

Knowing the measurements I used earlier, I decided to kind of wing it and create my own. What I came out of the oven was a delicious, peppery, cheesy scone. I had some left over blue cheese in the fridge so I decided to throw that in. Happy I did, it gave the scones a nice little bite, that pairs nicely with the mustard and pepper. I also heavily peppered the bacon before cooking it on a cookie sheet in the oven. The carrots are just to increase the number of health stars 😛

I made the scones both ways, in the pan and free-style. They’re both great, guess it just comes down to what you want them to look like.

The ingredients

photo (26)  

photo (23)

photo (24)

Cheesy Bacon Onion Scones

Ingredients

  • 2 cups All-Purpose flour
  • 1/2 teaspoon salt
  • 1 tablespoon baking powder
  • 6 tablespoons butter, cut into cubes, frozen for at least 30 mins
  • 1 cup grated or chopped sharp cheddar cheese
  • 1/4 cup (loosely packed) of crumbled blue cheese
  • 1 cup (tighly packed) of grated carrots
  • 6 strips of cooked, crispy bacon, chopped up
  • 3 scallions, cleaned, trimmed, and chopped (both white and green parts)
  • 2 large eggs
  • 1/3 cup milk, cream, sour cream, or ricotta cheese (I used light cream)
  • 1 tablespoon Dijon mustard, optional, for flavor
  • 1 teaspoon hot sauce or a pinch or three of cayenne, optional, for zing!
  1. Cut the butter into cubes and freeze it for 30 min before using, and make sure the oven is readily preheated on 450ºF/230ºC BEFORE starting the dough.
  2. Crumble the blue cheese, grate the carrots and dice the chives.  Place in a big bowl and set aside.  
  3. Combine flour, baking powder, salt and nutmeg in the food processor bowl.  Add the frozen butter and pulse until the butter is cut into small bits the size of barley.  You can also do this with a pastry cutter by hand.  
  4. Combine the flour mixture with the blue cheese and carrots.  
  5. Whisk the egg and heavy cream together, and add to the flour mixture.  Use a spatula to fold it together until JUST combined.  Some lumps are fine. If the mixture is too dry, feel free to add a little more cream. You want it sticky but manageable.

Option 1:

  1. Dust your hands and the dough with flour, and shape the dough into 8 round balls, it will be very sticky. Just keep dusting it with more flour and it will be fine.  Place them on the baking sheet lined with parchment paper with at least 2″ (5cm) of space in between.  Brush the top with egg wash and sprinkle with black pepper.
  2. Bake in the oven until puffed and golden brown, approx 15 ~ 20 min.

Option 2:

  1. Prepare an 8-inch non-stick round cake pan. I cut parchment paper out to fit the bottom of the pan to prevent burning and sticking.
  2. Turn the wet mixture out into the cake pan and lightly move it around so it’s level all around and pressed to the edges. Don’t push it down too hard. Brush with egg wash and sprinkle with black pepper.
  3. Bake in the oven until puffed and golden, about 15 ~ 20 min.
  4. Remove from oven, and cut it into slices, as you would a cake. I removed the slices and put them on a baking sheet and let them crisp up a bit for 4 minutes to finish them off.

Enjoy, let me know if you make these and how they turned out.

It’s become an obsession…

Hi. My name is Stephanie, and I’m an addict.

An addict of BREAD! I can’t stop baking it… I want to learn everything about it. Baguettes, French, Épis, whole wheat, gluten -free, seed bread… I want to bake it all.

I took a week hiatus from baking my usual Sunday loaves. I thought I could go a few weeks without it. Wrong. I worked from home the other day and decided I’d give my hand a try at baguettes. They’re smaller loafs so I won’t eat as much, right? Wrong again. I wondered if I could find a recipe that I could do in a few hours…

I hopped on Pinterest and did a search. Bang. Found a baguette recipe that could be done in four hours, AND it used bread flour which was the only flour I had on hand.  I’ve depleted my ‘stash’ of flour as I’ve kind of been, well, obsessed with it lately.

Enter, baguette recipe from Fine Cooking. I love this recipe because it’s really easy to follow and when you bake something for the first time, you want pictures dammit.  Telling me how many times to fold my thirds this way and that way, doesn’t exactly create an easy to follow diagram in my head so I welcome the illustrations. I followed the recipe, except added a bit of oil to the bowl when I let it do the first rise. I’m used to doing this with my other bread recipes and I like a bit of the oil to keep it moist.

I made three baguettes instead of 6. They were a great size for what I wanted, so don’t be shy with the sizes if you want yours a little bigger than foot long sub-looking buns.

Mini Baguette

Here’s the direct link to the recipe. This is a keeper in my books. Enjoy my friends!

If I only had bread and butter…. oh, and cheese.

Believe it or not, Sunday’s are one of my favourite days of the week.

For anyone who works Monday to Friday, you probably think I’m nuts.

I love Sundays because it’s my bread making day. I have been on a bread kick lately and every Sunday for the past month or so, I have made a beautiful hand shaped loaf of awesomeness. My experimentation has mostly been with French bread recipes and they’ve all worked out pretty well. The thing I really appreciate about *my* bread making is that not one loaf has been identical to another. I guess I should be strivin Each one I tweak a little bit, try different flour, more or less yeast, different herbs or seeds. Today I decided to switch it up and try my hand at a garlic and rosemary loaf. They are my two favourite herbs/spices and together they equal love. One thing I’ve learned is bread making requires patience. And wine. Bread making can be incredibly therapeutic if you let it.

While I sit and wait for the bread to complete the first rise (this is where the patience part comes in), I am sipping on the last of a 2008 Vidal I picked up from Konzelmann Estate Winery in Niagara yesterday. The more wine I have, the more patient I am, ha! I tasted this wine yesterday during a wine tour I went on with my girlfriends. Konzelmann was one of the fav wineries of the day. It was modern with a beautiful tasting room and very nice store and staff. Their icewine was to DIE for – we were told it was rated the best ice wine in Canada. They not only sold their wine, but also had a small selection of hot sauces, dip chillers, spice rubs, and other fun foodie gifts. If you are planning on doing a wine tour, I suggest you hit up Konzelmann.

Konzelmann Estate Winery 2008 Golden Vintage Vidal

Back to the bread.

I never wait until my bread cools completely. I impatiently hover over it with a bread knife in one hand, and a knife with a knob of butter ready to spread in the other. In my opinion, there’s simply nothing better than a warm piece of bread slathered with butter. (Ohh, I’m salivating already). I know it’s not the healthiest thing in the world, but if you don’t have warm bread and butter, how can you go on in life? If I was stranded anywhere, ever, I’m fairly certain I’d survive if I only had bread and butter. Oh, and cheese. Everything must have cheese, right?

I hope you enjoy this recipe as much as I do.

20130304-115314.jpg

Ingredients

2 cups unbleached all-purpose flour

2 cups bread flour

1 ¼ cup warm water, divided

3 to 5 tbs olive oil

2 ½ tbs dry or fresh rosemary, crushed

5 cloves garlic, minced

1 tbs active dry yeast

2 ½ tsp salt

2 ½ tsp sugar

Instructions

  1. Mince the garlic and crush the dry rosemary or mince the fresh and place into a small bowl.
  2. Pour about a teaspoon of olive oil over the garlic and rosemary. Stir to moisten the dry rosemary (if using dry) or to coat the fresh rosemary and garlic. Set aside.
  3. Put ½ cup of water into a small bowl and warm to body temperature in the microwave.
  4. Sprinkle the yeast over the water and stir. Set aside.
  5. In the bowl of a stand mixer fitted with a dough hook put the flour, salt and sugar.
  6. Turn the mixer on low and mix for about 1 minute.
  7. Measure ¾ cup of water into another bowl and add 3 tablespoons of olive oil.
  8. Warm in the microwave to body temperature.
  9. Turn the mixer on low and add yeast and water. Mix for one minute.
  10. Pour the warm water and olive oil into the mixer and mix for about 2 minutes on low.
  11. Pour in the olive oil and herbs.
  12. Turn the mixer on medium low and knead with the dough hook for about 5 minutes.
  13. If the dough seems too wet add about a tablespoon of flour at a time to the bowl and continue to knead. If the dough seems too dry dribble about a teaspoon of olive oil into the bowl.
  14. Knead until smooth or about 8 to 10 minutes in total.
  15. Place the ball of dough into a greased bowl and set in a warm spot till it doubles in size, about 1-2 hours. I put the bowl in my oven with the light turned on.
  16. After the dough has risen punch down and divide in half.
  17. You can form the dough into two rounds or two small bread loaves on a greased cookie sheet or a pizza stone sprinkled with cornmeal. The pizza stone is my favourite way to bake bread.
  18. Let loaves rise until doubled. About an hour.
  19. After the loaves have risen if you have been using your oven to keep them warm remove them from the oven and preheat to 350 degrees.
  20. Carefully brush some olive oil over the tops. This will help the crust have a buttery, flaky crust.
  21. Bake the loaves for 30 to 40 minutes or until the loaves sound hollow when you knock on the bottom.
  22. Cool on cooling racks and enjoy!