Linguine with Lemon-Dill Vodka Cream Sauce

It’s snowing like hell out… I’m lazy, sick with a cold, and want something easy but decadent for dinner.  Enter pasta and a salad.

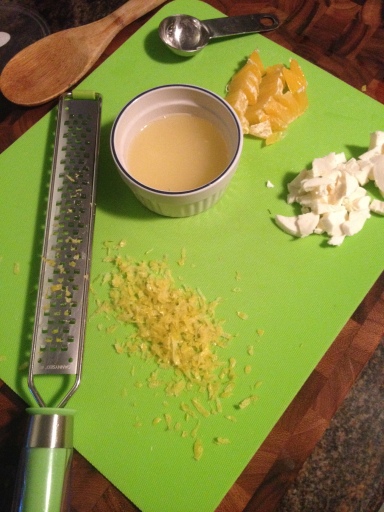
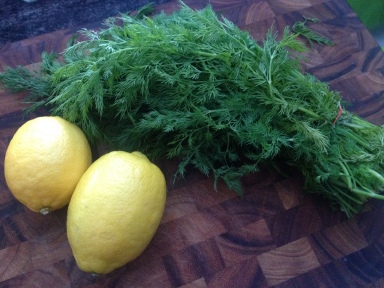
I am not in the mood for anything with tomato sauce (or fat-free apparently), so I’ve shifted my attention to a cream sauce. I have fresh dill and a couple of lemons in the fridge and a bag of frozen peas in the freezer. Hey, just because it’s a creamy dish doesn’t mean we can’t lighten it up a bit with some tasty peas! If you have asparagus laying around, that would work well too.

This sauce takes some time to reduce, so plan ahead. I like to eat dinner early so I don’t mind starting it at 4 and letting it simmer down until 5 or so. Dinner can be on the table by 5:30. Score.

IMG_3016

If you don’t have fresh dill you could use dry, but fresh is the way to go if you can. Know how you always end up with more dill than you need when you buy it? We usually use so little of that massive amount of fresh herb. Here’s my solution: chop it up, evenly distribute it into ice cube trays and pour olive oil over each ‘cube’. Freeze. Pop them out and store in a freezer zip-lock bag, in the freezer.  Next time you need dill olive oil combo, you’re ready to go. (Makes for easy salad dressings too!) Brilliant huh.

IMG_3018

IMG_3025

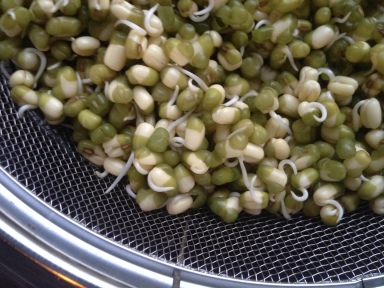
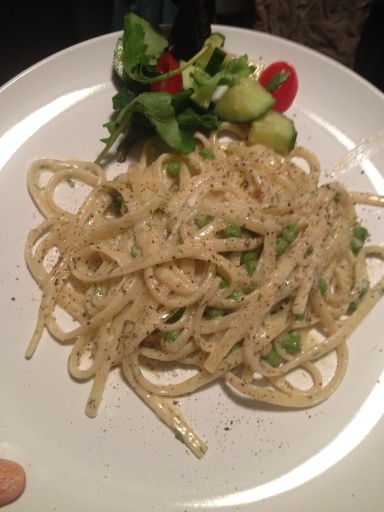
For my salad, I’m keeping it simple with a baby kale/spinach mix, cherry tomatoes, cucumber, sliced oranges, fresh buffalo mozzarella and some fresh mung bean sprouts I’ve been sprouting. They are crunchy and perfect to round out the salad. For the dressing, I’ll probably just drizzle some olive oil and finish with a squeeze of lemon and zest. Simple and perfect.

IMG_3024

Enjoy this sauce with parpadelle, linguine or wagon-wheel pasta. Toss pasta in sauce and enjoy!

IMG_3028

Ingredients:

  • 1 tbsp olive oil
  • 2 garlic cloves, finely chopped
  • 1 medium onion, finely chopped
  • 3 cups organic vegetable or chicken stock
  • 1 cup heavy cream
  • 1/3 cup vodka
  • 1 tsp salt
  • 1 cup frozen sweet peas
  • ½ cup chopped fresh dill
  • 1 tbsp grated fresh lemon zest
  • 1-2 tbsp fresh lemon juice
  • 1 tbsp dijon mustard
  • ¼ tsp fresh ground pepper
  • Knob of butter
  • Grated parm cheese (optional)

Directions:

  1. Cook onion in oil in a heavy saucepan over moderate heat, stirring occasionally, until softened (but not browned), about 4 minutes. Add garlic and stir.
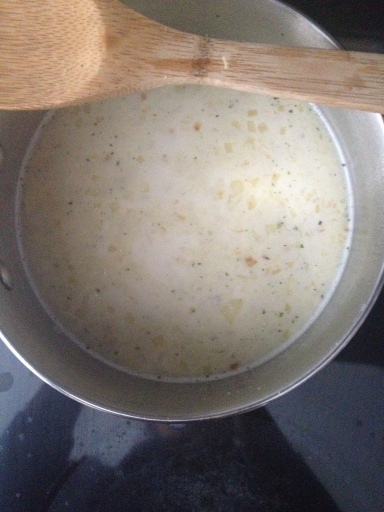
  2. Add broth, cream, vodka, and salt and boil over moderately high heat, stirring occasionally, until sauce is significantly reduced to 2 cups, 50-60 minutes.
  3. Remove from heat and stir in peas, dill, lemon zest and juice, dijon mustard, pepper and butter. Stir to combine.
  4. Pour over pasta and toss until pasta is completely coated. Sprinkle fresh parm cheese on top (optional).
Raw Food Reset – Day 2

Woke up in this morning feeling pretty good.  I unfortunately was up at 4am stretching my glutes, hamstring and inner thigh from the run.  I knew I’d feel it later in the day if I didn’t stretch, so there I was at 4am, laying on the carpet at the foot of the bed, stretching.  My cat Art laid down beside me and watched. Cute. I slept till 6 something, hit snooze a few times and hopped in the shower.

I thought I would wake up starving, but I didn’t. I was a little hungry, but I knew I could wait until work to eat my banana. I had a glass of raw apple cider that I bought from the farm on Sunday before leaving the house. So fresh, so sweet.  I don’t usually drink juices so this is new for me. I like it.

Weighed myself this AM as well. I’m down 2lbs. lol. LoosingI the water weight is so awesome.

I forgot my raw collard wrap that I had planned on having for lunch, so I knew I’d have to grab something from the cafe at work because the salad wouldn’t be enough. It was a long day at work, didn’t leave the office until after 6pm, so the 2nd apple I packed myself came in handy. Back to back meetings, busy designing training material I didn’t leave my desk much. Only to refill my hot water and go to the loo.  Productive person I am! (Yoda voice)

Here’s what I ate today:

Breakfast: Organic banana, raw apple cider

Snack: 1 Kiwi, assorted veggies with almond butter (ate this throughout the day, not just for AM snack)

Lunch: Salad with apple, walnuts, sesame seeds, pumpkin seeds, chia seeds, tomato, cucumber, grated carrots and kale.

Dinner: Made that cleanse gazpacho soup from the DO EAT RAW app. I failed to add the avocado and lemon juice at first when I was blending it and it came out kinda chunky. Like watery salsa. I wasn’t impressed but figured, what the hell.  I managed to find a ripe avocado and a lime and added the juice and the whole avocado. WHAT a difference.  Creamy and delicious. I also added a good pinch of salt and ground chipotle pepper to it for a kick.

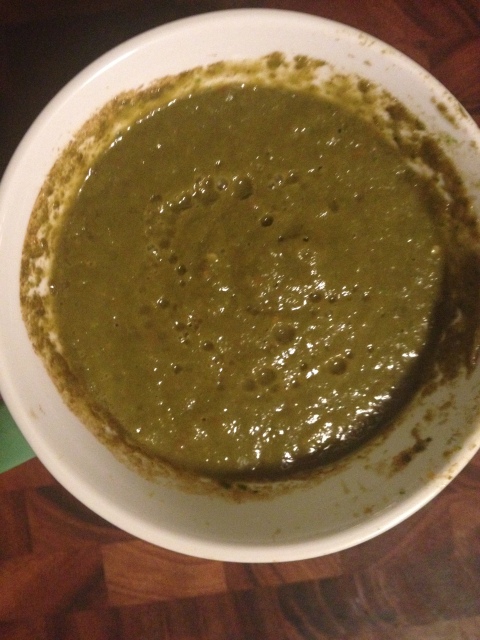
The soup doesn’t LOOK that appetizing, but it is pretty good. I’ll definitely make it again. I forgot to add the spinach, so mine only has kale in it. Next time I’ll add that too. My blender just wasn’t big enough and I had to keep doing it in batches until the consistency was to my liking.

Cleansing Gazpacho Soup

Cleanse Soup

Ingredients

  • 2 little red bell peppers chopped
  • 6 green onions
  • 3 celery stalks
  • 1 avocado
  • 2 garlic cloves
  • 2 tomatoes chopped
  • 5 leaves kale, chopped
  • Ginger root, 1/2 inch
  • 1 cup fresh cilantro
  • 1 cup fresh basil
  • 1/2 cup fresh spinach
  • Himalayan sea salt, pinch
  • 1/2 tsp ground chipotle pepper
  • 2 tbsp lemon or lime juice
  • 1 cup warm water

Blend all ingredients in a blender until creamy and smooth.  Tada!

So I totally cheated a bit tonight and sautéed (on super low heat) some chopped crimini mushrooms.  I really felt like I needed something more tonight but after eating maybe 2 mushrooms, I had enough.  Weird.  I packed the rest for lunch tomorrow.

I didn’t even eat all the soup that I had poured for myself. I’m hungry but I’m not, and I’m not used to it. I’m so determined to eat clean that even though I want a HUGE hunk of cheese or a toasted bagel with whatever salami I can find with mayo spread all across it, I still wouldn’t eat it if you put it in front of me.

No exercise today, some stretching before bed but that’s about it. I will do sprints tomorrow to prep for the race on Sat, but that will probably be the extent of my cardio this week. Yoga on Thursday and MAYBE spinning on Friday. I hate to say no to a spinning class!

So far.. day 2 is a success!

Thursday and MAYBE spinning on Friday. I hate to say no to a spinning class!

So far.. day 2 is a success!

SUMMER FOOD! Lemony Chickpea Quinoa Burgers

Howdy friends! I know I’ve been lacking on posts lately and for that, I apologize! The summer has been awesome so far and super busy. I haven’t been dedicating much time to writing, because I’ve been so busy doing other stuff like camping,

Me on the rocks

gardening,

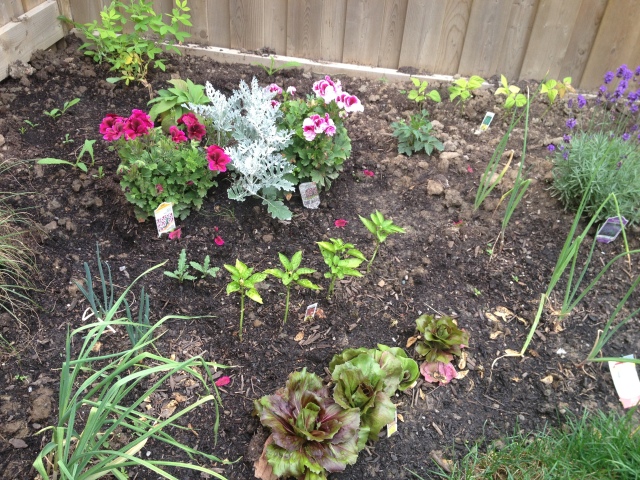
Garden

cottaging, cooking and lounging in the backyard!

Lake

Herb planters

 
Loungecat

Dinner Wars

How has the weather been in your neck of the woods?  It’s been a bit random here with some crazy rain (hello Toronto floods!), but we are having a wicked heat wave this week. I’m not complaining, I love the heat, but sometimes it’s too hot and muggy that you don’t feel like eating or cooking much.

I wanted to share a recipe for a vegetarian ‘burger’ that I really love for those hot summer nights. It’s easy to put together and holds up well on the grill. There is minimal prep for this dish, and the lemon gives it a really refreshing scent and taste. This recipe could be adapted to be vegan by replacing the egg with Ener-G (may need to add a tsp of soy milk if you need more moisture).  I topped the burger with tomato, avocado and some carmelized onion ‘jam’. No bun and it didn’t need it, but if you need the bread it would hold up for that.

I served this up with a simple spinach salad with strawberries I picked at a local farm. For the dressing I whisked up some balsamic vinegar, dijon mustard, olive oil and a pinch of salt and pepper.  Voila. Summer at it’s best. Enjoy!

Ingredients

  • 1 (540 mL)can Chick Peas, rinsed, drained and patted dry
  • 1/3 cup chopped red onion
  • 1/4 cup chopped fresh parsley
  • 2 cloves                garlic, chopped
  • 1 tbsp each lemon zest and juice
  • 1 tsp ground coriander
  • 1 1/2 tsp each salt and pepper
  • 1 egg
  • 1/2 cup cooked and cooled quinoa
  • 1/4 cup rolled oats

Optional ingredients:

  • 2 tbsp ground flax
  • 1/4 cup chopped mushrooms of your choice
  • 1/4 cup panko if you find the mixture too wet to shape into patties
  • Pinch of cayenne pepper (to taste)

The good thing about this recipe is that you can taste it as you go (before adding the raw egg), so you can adjust seasoning along the way.

Directions:

  1. PULSE all ingredients in a food processor until well combined and fairly smooth. Shape mixture into 4 equal-sized patties. Cover with plastic wrap and refrigerate until needed.
  2. PREHEAT barbecue to medium-high. Grill patties with lid closed for 8 to 10 min., flipping once.

RECIPE: Lemon Balm Tea

I planted a couple of lemon balm plants in the garden these past couple of weeks. Not only do do they smell great when the leaves are rubbed, it self-seeds readily in flowerbeds or even gaps between paving. It is a common but under appreciated garden plant, possibly because it is easy to grow – it is tolerant of a range of conditions, including drought, and isn’t affected by many pests and diseases.  Want to try planting it? Even a small scrap of stalk will readily root in a glass of water, making it a plant for garden visitors to take home and grow on a windowsill or in their own garden.

Lemon balm is often used as a flavouring in ice cream and herbal teas, both hot and iced, often in combination with other herbs such as spearmint as it is actually from the mint family. It is also frequently paired with fruit dishes or candies. It can be used in fish dishes and is the key ingredient in lemon balm pesto.  For companion planting: If you are growing tomatoes, plant lemon balm beside them, it will improve flavour and growth in the tomatoes.

Today I made a lemon balm tea. It is said that lemon balm has a calming effect and is a good night time tea.  You can add a little honey or stevia to sweeten it up if you need it, or it can be drank alone as it has a very light but aromatic flavour.

To make the tea:

  1. Grab a handful of leaves from the garden
  2. Wash them gently in cool water, pat dry
  3. Bruise the leaves by crushing them together or pulling apart
  4. Add to a large pitcher and add 4-5 cups of boiling water.
  5. Allow the leaves to steep in the water, keep the lid on or you will lose the aromatics of the leaves.
  6. Allow the tea to cool. When ready to drink, pour it into a mug and reheat. Add a 1/2 tsp of stevia or natural honey if you want sweetness.

You’ll notice that the tea is very light but has a slight lemony-mint flavour. It’s beautiful and so nice to have fresh tea, made right from the garden!

Enjoy!

Super Simple Anytime Quinoa

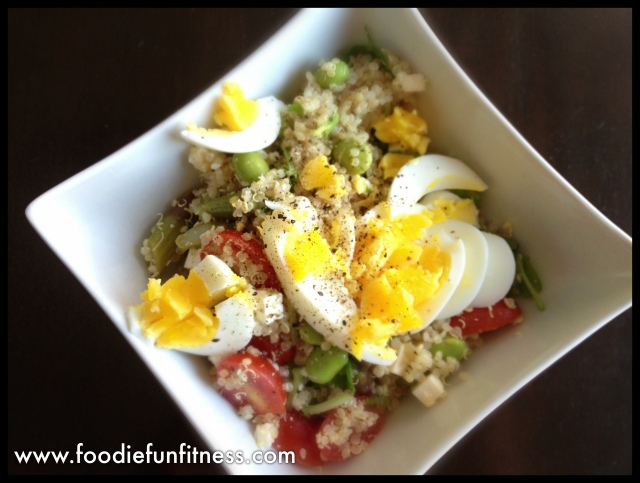
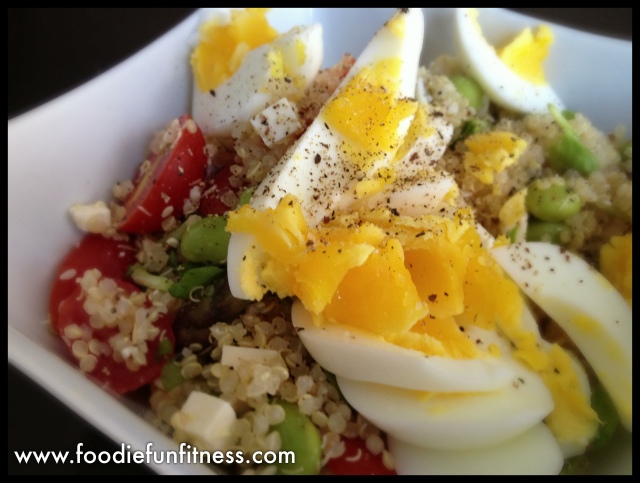
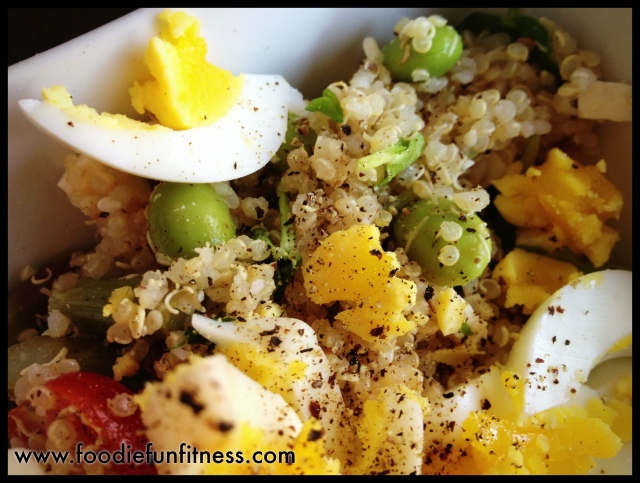
For those of you who may have read the previous post, I was at a farm a couple of weeks ago and picked fresh asparagus, yummmm. I had a little bit left over (It was still good, surprisingly.My mom gave me an asparagus holder type thingy so I`ve stored it in that, water in the bottom) and I knew it needed to be added to the quinoa dish, whatever it was going to be. I also had a block of feta, some cherry tomatoes and some pea shoots in the fridge. Yep, let`s have a party kids

I have to admit that I haven`t bought any groceries this week. It`s been a bit of a weird week and super busy so we have eaten out a few times. Yesterday I was getting desperate and needed something for lunch. Here`s my recipe (below pics) for a super simple quinoa.  We enjoyed it before softball last night and I transformed it into breakfast this morning just by adding an egg!

It`s super simple, very quick to throw together, and easy to transform into another dish, like breakfast 🙂

Super Simple Anytime Quinoa

Quinoa

Quinoa

Ingredients:

  • 1 cup cooked quinoa
  • 7-8 spears of blanched asparagus
  • 10 cherry tomatoes, halved
  • 1/2c Steamed or boiled edemame
  • feta cheese, chopped into mini squares (use your discretion as to how much, I like A LOT)
  • handful of pea shoots, roughly chopped
  • 1 lemon, juiced
  • 2 tbsp apple cider vinegar
  • 3 tbsp EVOO
  • a couple of shakes of garlic powder
  • 1-2 tbsp maple dijon mustard (I used President`s Choice)
  • salt and pepper to taste

Directions:

  1. Roughly chop the blanched asparagus. Add it to the cooked quinoa. Add the cherry tomatoes, pea shoots, and feta cheese. Toss to combine.
  2. Mix lemon juice, EVOO, apple cider vinegar, mustard, garlic powder and salt and pepper together in a bowl. Whisk until combined.
  3. Pour `dressing` over quinoa mixture. Combine well. Season to taste.

Add an egg or some meat to change it up. Things like cooked shredded chicken, sausage or bacon would make this great too. To keep it vegetarian, throw in some more of your favourite veggies or make a lettuce wrap out of it!

Enjoy friends.

Snack Alert! Roasted Broccoli

Need a REALLY tasty snack? Roast up some broccoli my friends! Make sure it gets a little charred. That’s the best part…. here’s the trick: Sugar!  This snack is ultra addictive, so be prepared to finish the whole head (or two!)

Recipe:

  • Take a head or two of broccoli, cut it into length-wise florets.
  • Add 2 tbsp of olive oil
  • 1 tsp sugar
  • 1/4 tsp sea salt
  • pepper to taste
  • garlic powder (optional)

roasting it baby!

  1. Cover a baking sheet with foil and pop it in the oven. You want the baking sheet to get super-hot so the broccoli gets the nice char on one side.
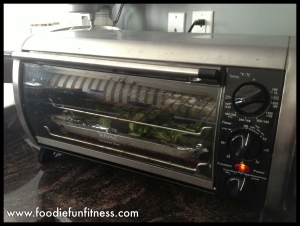
  2. Pre-heat oven to 450 degrees. I use a toaster oven b/c it uses less energy.
  3. Cut florets as mentioned above, and toss with all the other ingredients. I like to add a little garlic powder, ’cause, well I’m addicted to garlic. So what.
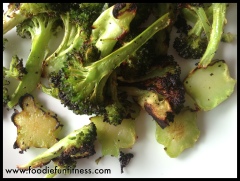
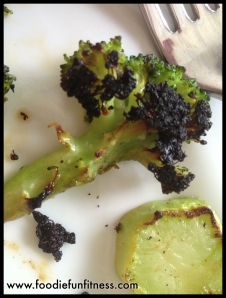
  4. Throw those puppies on the hot baking sheet and bake for 11 mins, or until they start to char on one side.  Don’t worry if they look burnt. That adds to the flavour.
  5. Pull ’em out of the (toaster) oven and squeeze a little fresh lemon juice on ’em.
  6. DEVOUR.

broccoli2

broccoli1

I literally just ate two heads of broccoli. I couldn’t help it. I meant to save some for the drive later but I couldn’t. They were THAT good.  The sugar is not too much that you taste it, but it aids in the charring. For those of you who are thinking that the sugar reduces the ‘healthy-ness’ of it, sure I guess. But you’re missing the point. It’s not enough sugar to make it candy, it’s to help bring out the sugar that’s already in it.  It will convert you non-broccoli lovers. Promise, mmkay? 🙂

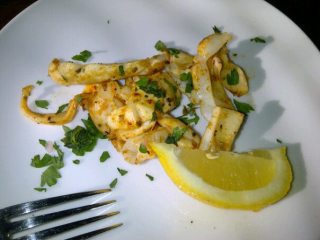
The Best Calamari I’ve Ever Made.

A few months ago, B made paella. Damn it was a beautiful thing.  After prepping the seafood for the paella, we realized we had WAY too much seafood.  Instead of overwhelming the dish we decided to put the extra squid aside and use it for an appetizer the next day.  I figured a great way to use it would be a delicious grilled calamari appie. I am the queen of appies and had never actually grilled my own calamari before so I thought this would be fun.

I didn’t marinate it very long because I couldn’t wait to try it. Don’t worry, you don’t need to let it sit for 2 hours, if you only have 30 mins to let it rest in the marinade, do it. It’s still good to go. 😉  I sprinkled a bit of Emril’s Essence seasoning on top because I always have a small batch of that laying around.  The result was the best calamari I have ever made.

Ingredients:

  •  1 1/2 pounds cleaned squid (about 3 pounds whole) tentacles separated from the bodies, rinsed and patted dry
  • 1/4 cup extra-virgin olive oil, plus more for drizzling
  • 1 tablespoon fresh lemon juice
  • 2 teaspoons fresh oregano leaves
  • 2 cloves garlic, peeled and smashed
  • 1/4 teaspoon salt
  • 1/4 teaspoon red pepper flakes
  • Chopped parsley, garnish
  • Lemon wedges, garnish

Directions:

  1. Cut the squid bodies along the sides to open flat. With a thin sharp knife, lightly score the insides, being careful not to cut through all the way.
  2. In a bowl, combine 2 tablespoons of the olive oil, lemon juice, oregano, garlic, salt, and red pepper flakes. Add the squid bodies and tentacles, toss to coat, and marinate for 2 hours, refrigerated, turning twice.
  3. Preheat the grill to high heat.
  4. Grill the squid, turning until opaque, slightly golden, and just cooked through, about 2 to 3 minutes. Remove the squid to a cutting board and slice into strips. Slice the tentacles if desired. Give a squeeze of lemon and garnish with chopped parsley and lemon wedges.

You can thank me later.

Moans for scones.

Yesterday B and I went out for Dim Sum with some friends. While nom-noming on delicious little items tucked neatly into steamers, my friend mentions that when we are all settled in our new homes (we’re moving a week apart from each other, in the same city) that I’ll have to show her how I made my baguettes. She promised to teach me how to make Filipino food, which I absolutely adore. There are so many dishes I haven’t even tried to recreate from my time in Manila, so I’m stoked to have a cooking lesson from her. I squealed at the thought of us cooking and baking together. Right then, then she whips her head around and says to me;

You’ll have to make SCONES!

Scones? Really? Hmm.

I don’t really recall meddling in the scone-zone. The only thing close I could recall were some cheddar jalapeno biscuits I tried out years ago, but that was when I first started exploring the kitchen and I just used Bisquick mix. Hardly a revolutionary recipe.

So this morning I woke up and I was on a mission. Scones day. Lots and lots of scones. Thing is, because we are moving we packed the kitchen yesterday and pretty much everything I’d need to use to bake them. Time to go digging.

I found a round cake pan, and decided that would work. I don’t own a scone pan. I didn’t even know they existed until today, thanks to the internet :).  I found my measuring cups and pulled out the flour. I had some dried cranberries in the pantry and figured I would make something with those, even though I’m not a fan of dried fruit in stuff. I really, don’t like dried fruit in anything.  Wait, I made white chocolate chip macadamia nut cookies with dried cranberries this past Christmas, but I only liked them because of the nuts and chocolates. Okay, the cranberries were pretty, but that’s about it.

So I did some searching and found the recipe I wanted to try. I landed on this really great blog called CravingThis. Here is the recipe.

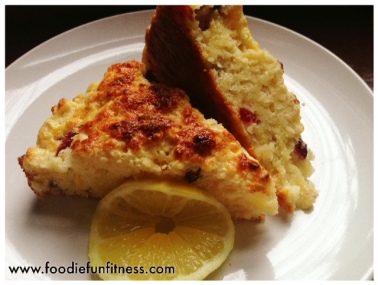
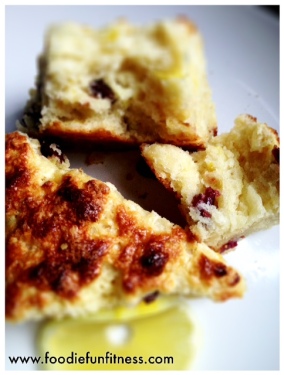
I did make one alteration which was to use light cream instead of buttermilk. They turned out great with that change and were soft, light and fluffy. I actually like the cranberries in it because there isn’t too much of them and they are not overly sweet either which is what I was aiming for. The crust is nice and flaky and the lemon zest and juice add a really nice flavour to this scone. It’s kind of cake-like, which is fine by me. Definitely brush the top with an egg wash and sprinkle sugar on top before baking. You won’t be able to wait until they are cooled.

ImageImage

You thought that was it, right? Ha! Read on my friends 🙂  I used the lemon cranberry scone as a stepping stone to the next level and had my mind blown. (Yes I made that up).

I don’t like dried fruit, but I absolutely LOVE cheese. Next: Savory scones? Challenge accepted!

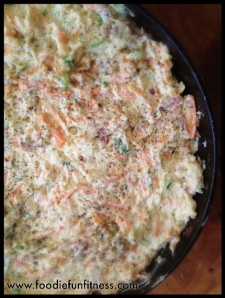
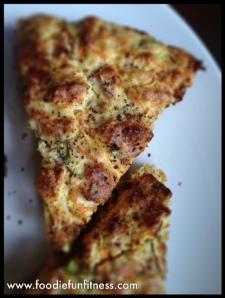
Knowing the measurements I used earlier, I decided to kind of wing it and create my own. What I came out of the oven was a delicious, peppery, cheesy scone. I had some left over blue cheese in the fridge so I decided to throw that in. Happy I did, it gave the scones a nice little bite, that pairs nicely with the mustard and pepper. I also heavily peppered the bacon before cooking it on a cookie sheet in the oven. The carrots are just to increase the number of health stars 😛

I made the scones both ways, in the pan and free-style. They’re both great, guess it just comes down to what you want them to look like.

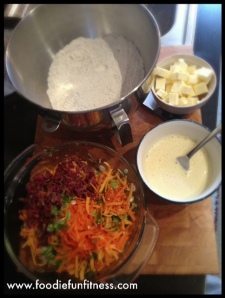
The ingredients

photo (26)  

photo (23)

photo (24)

Cheesy Bacon Onion Scones

Ingredients

  • 2 cups All-Purpose flour
  • 1/2 teaspoon salt
  • 1 tablespoon baking powder
  • 6 tablespoons butter, cut into cubes, frozen for at least 30 mins
  • 1 cup grated or chopped sharp cheddar cheese
  • 1/4 cup (loosely packed) of crumbled blue cheese
  • 1 cup (tighly packed) of grated carrots
  • 6 strips of cooked, crispy bacon, chopped up
  • 3 scallions, cleaned, trimmed, and chopped (both white and green parts)
  • 2 large eggs
  • 1/3 cup milk, cream, sour cream, or ricotta cheese (I used light cream)
  • 1 tablespoon Dijon mustard, optional, for flavor
  • 1 teaspoon hot sauce or a pinch or three of cayenne, optional, for zing!
  1. Cut the butter into cubes and freeze it for 30 min before using, and make sure the oven is readily preheated on 450ºF/230ºC BEFORE starting the dough.
  2. Crumble the blue cheese, grate the carrots and dice the chives.  Place in a big bowl and set aside.  
  3. Combine flour, baking powder, salt and nutmeg in the food processor bowl.  Add the frozen butter and pulse until the butter is cut into small bits the size of barley.  You can also do this with a pastry cutter by hand.  
  4. Combine the flour mixture with the blue cheese and carrots.  
  5. Whisk the egg and heavy cream together, and add to the flour mixture.  Use a spatula to fold it together until JUST combined.  Some lumps are fine. If the mixture is too dry, feel free to add a little more cream. You want it sticky but manageable.

Option 1:

  1. Dust your hands and the dough with flour, and shape the dough into 8 round balls, it will be very sticky. Just keep dusting it with more flour and it will be fine.  Place them on the baking sheet lined with parchment paper with at least 2″ (5cm) of space in between.  Brush the top with egg wash and sprinkle with black pepper.
  2. Bake in the oven until puffed and golden brown, approx 15 ~ 20 min.

Option 2:

  1. Prepare an 8-inch non-stick round cake pan. I cut parchment paper out to fit the bottom of the pan to prevent burning and sticking.
  2. Turn the wet mixture out into the cake pan and lightly move it around so it’s level all around and pressed to the edges. Don’t push it down too hard. Brush with egg wash and sprinkle with black pepper.
  3. Bake in the oven until puffed and golden, about 15 ~ 20 min.
  4. Remove from oven, and cut it into slices, as you would a cake. I removed the slices and put them on a baking sheet and let them crisp up a bit for 4 minutes to finish them off.

Enjoy, let me know if you make these and how they turned out.